Kategorie: Developer

  • Replacing Swagger with Scalar in a Containerized Aspire.NET Project

    Replacing Swagger with Scalar in a Containerized Aspire.NET Project

    Introduction

    In modern .NET projects, API documentation is a must. While Swagger has become the default choice, Scalar offers a clean, minimal alternative with powerful customization options. In this tutorial, we’ll walk through how to integrate Scalar into a containerized .NET 8 API that runs as part of an Aspire.NET app.

    This article is tailored for experienced developers looking to modernize their API tooling in a cloud-native setup. You’ll learn:

    • How to replace Swagger with Scalar in your ASP.NET Core app
    • How to expose Scalar in a containerized setup using Aspire.NET
    • How to fine-tune Scalar’s behavior using MapScalarApiReference

    Problem & Context

    Swagger is ubiquitous, but not always lightweight. Scalar steps in as a faster, more minimal alternative. In a recent microservices project based on Aspire.NET, we wanted to:

    • Provide clean OpenAPI documentation
    • Run the documentation UI within the API container
    • Keep the developer experience seamless via Aspire Dashboard

    Scalar supports all of this out-of-the-box – but setting it up in an Aspire app (with containerization) needs a few deliberate steps.

    Solution: Integrating Scalar in a Containerized API

    Step 1: Install Scalar

    First, add the Scalar NuGet package to your ASP.NET Core API project:

    dotnet add package Scalar.AspNetCore


    Ensure that you’re also adding OpenAPI generation:

    builder.Services.AddOpenApi();


    This enables the OpenAPI spec that Scalar will use under the hood.

    Step 2: Configure Scalar Middleware

    In your Program.cs, hook up Scalar using MapScalarApiReference inside the if (app.Environment.IsDevelopment()) block:

    app.MapOpenApi();
    
    app.MapScalarApiReference(options =>
    {
        List<ScalarServer> servers = [];
    
        string? httpsPort = Environment.GetEnvironmentVariable("ASPNETCORE_HTTPS_PORT");
        if (httpsPort is not null)
        {
            servers.Add(new ScalarServer($"https://localhost:{httpsPort}"));
        }
    
        string? httpPort = Environment.GetEnvironmentVariable("ASPNETCORE_HTTP_PORT");
        if (httpPort is not null)
        {
            servers.Add(new ScalarServer($"http://localhost:{httpPort}"));
        }
    
        options.Servers = servers;
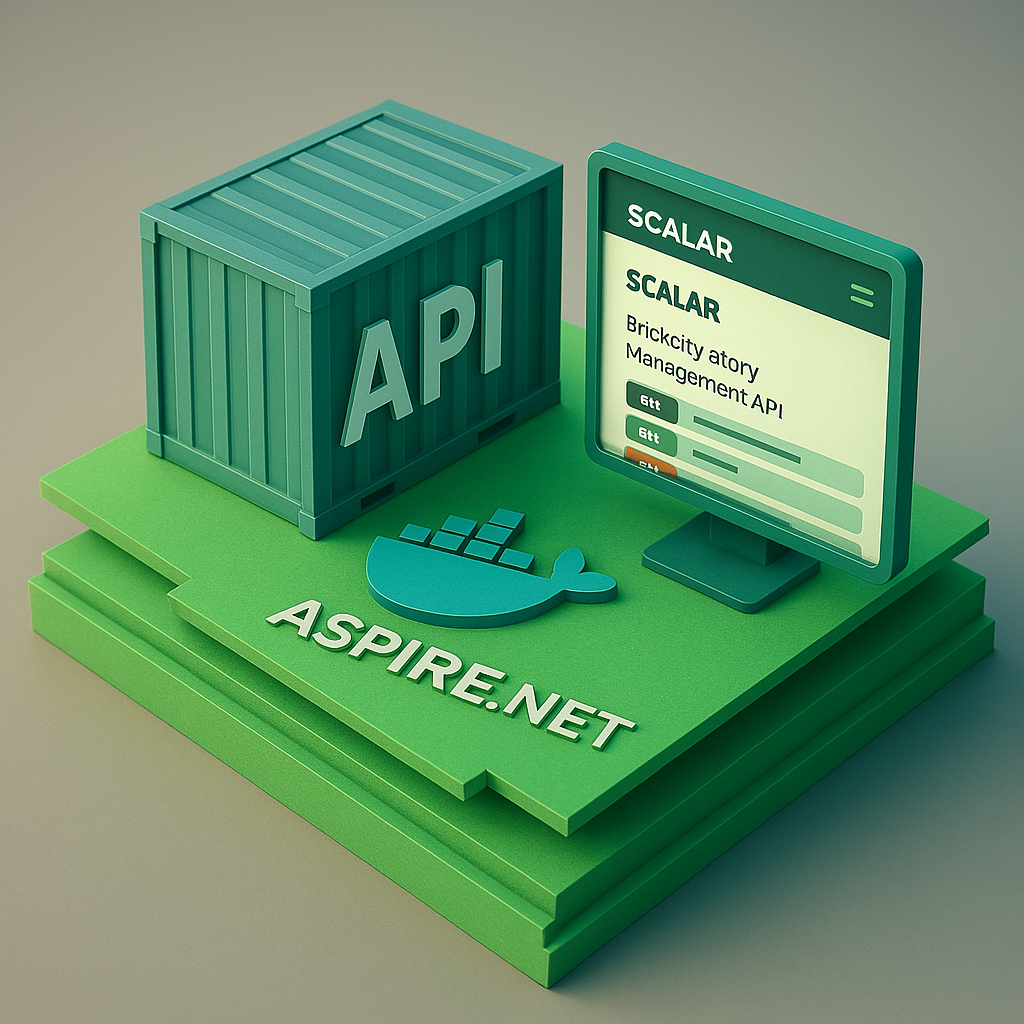
        options.Title = "Brickcity Story Management API";
        options.ShowSidebar = true;
    });


    This setup ensures that Scalar dynamically detects the correct port – even when running in a container.

    Step 3: Configure Launch Settings

    Make sure your launchSettings.json exposes the right ports and opens the Scalar UI:

    "launchUrl": "scalar",
    "applicationUrl": "https://localhost:7154;http://localhost:5185",


    In your Docker profile:

    "environmentVariables": {
      "ASPNETCORE_HTTPS_PORTS": "8081",
      "ASPNETCORE_HTTP_PORTS": "8080"
    },
    "launchUrl": "{Scheme}://{ServiceHost}:{ServicePort}/scalar",
    "publishAllPorts": true


    These environment variables are picked up by the middleware to build the correct OpenAPI server URLs.

    Step 4: Connect via Aspire

    In your AppHost project, reference the API project like this:

    IResourceBuilder&lt;ProjectResource> apiStory = builder
        .AddProject&lt;Projects.BrickCity_Api_StoryManagement>("api-story-management");


    Aspire takes care of service discovery, dashboard integration, and default port mapping. You should now be able to access the Scalar UI directly via the Aspire dashboard or by browsing to:

    http://localhost:<assigned-port>/scalar


    Use Case: Brickcity Story Management API

    In our case, we applied this setup to the Brickcity Story Management API. The API runs as a containerized service managed by Aspire, and developers get instant access to the documentation UI locally via /scalar. Thanks to the flexible port handling, the experience is seamless even in multi-service environments.

    Performance-wise, Scalar loads faster than Swagger and keeps the focus on the essentials – ideal for internal APIs and rapid iterations.

    Conclusion & Takeaways

    Scalar is a great replacement for Swagger if you value speed and simplicity. Combined with Aspire.NET, it fits naturally into modern, containerized .NET environments.

    Key Learnings:

    • Use MapScalarApiReference() to fine-tune behavior
    • Pass HTTP/HTTPS ports via env vars for container compatibility
    • Let Aspire handle service wiring and discovery
    • Keep your dev loop fast with launchUrl: "scalar"

    What’s next?

    Have you already tried Scalar in production? Curious how it behaves with versioned APIs? Let’s discuss!

    For more insights, check out:

  • Injecting Environment Variables into React Apps in Docker on Azure

    Injecting Environment Variables into React Apps in Docker on Azure

    Introduction

    Environment-specific configuration is easy in backend systems. You use environment variables, and everything just works. But with frontend applications like React, which are built ahead of time and served statically in the browser, things get a bit trickier.

    In this post, you’ll learn how to inject dynamic environment variables into a React application running inside a Docker container, specifically in a setup deployed to Azure Container Apps. You’ll see why the default approaches don’t work, and how to implement a flexible solution that doesn’t require rebuilding your frontend every time a config value changes.

    The Problem: Static Frontend vs. Dynamic Config

    React apps are compiled ahead of time. When you run npm run build, the output is a static bundle that includes all environment variables available at build time. Once deployed, your app in the browser has no way to read server-side variables — there’s simply no Node.js, no access to process.env, nothing.

    So what happens when you need to inject something dynamic, like the URL of a backend API or an image CDN endpoint, and you want that to vary per deployment environment?

    You could rebuild the app with different .env files, but that quickly gets tedious — especially in a containerized cloud environment like Azure.

    The Solution: env.js to the Rescue

    Instead of trying to jam dynamic values into the React build, we inject them at runtime. The trick is to create a small JavaScript file, say env.js, that sets a global window.env object. Here’s what it might look like:

    window.env = {
      BACKEND_URL: 'https://my-backend-service.azurecontainerapps.io',
      IMAGE_ENDPOINT: 'https://somestorageaccount.blob.core.windows.net/myspecialcontent',
      WELCOME_MESSAGE: 'When you read this, while running in Azure Container apps, then the env.js file is not generated correctly with createenv.sh while starting the container.'
    };


    This file is included via a <script> tag in your index.html before your React bundle is loaded. Inside your app, you can then access window.env.BACKEND_URL and friends — fully dynamic, and updated per deployment.

    Building env.js at Container Startup

    To avoid rebuilding the container every time a config value changes, we generate the env.js file at container startup, using a simple shell script.

    Here’s the script createenv.sh:

    #!/bin/sh
    
    # Set output path for env.js
    FILE="/usr/share/nginx/html/env.js"
    
    # Read values from container environment
    VALUE_IMAGE_ENDPOINT="https://$STORAGE_ACCOUNT_NAME.blob.core.windows.net/$STORAGE_CONTAINER_NAME"
    VALUE_WELCOME_MESSAGE=${WELCOME_MESSAGE:-"WELCOME_MESSAGE not set in environment"}
    VALUE_BACKEND_URL=${BACKEND_URL:-"BACKEND_URL not set"}
    
    # Write env.js
    cat <<EOL > "$FILE"
    window.env = {
      BACKEND_URL: '${VALUE_BACKEND_URL}',
      IMAGE_ENDPOINT: '${VALUE_IMAGE_ENDPOINT}',
      WELCOME_MESSAGE: '${VALUE_WELCOME_MESSAGE}'
    }
    EOL
    
    echo "env.js written to $FILE"


    This script is executed via an entrypoint.sh script:

    #!/bin/sh
    
    echo "Running entrypoint.sh..."
    ./app/createenv.sh
    exec "$@"


    Dockerfile

    Here’s the full Dockerfile that uses a multi-stage build:

    FROM node:20 AS build
    WORKDIR /app
    COPY package.json package-lock.json ./
    RUN npm install
    COPY . .
    RUN npm run build
    RUN apt-get update &amp;&amp; apt-get install -y dos2unix
    RUN dos2unix ./createenv.sh
    
    FROM nginx:stable-alpine
    COPY nginx.conf /etc/nginx/conf.d
    COPY --from=build /app/dist /usr/share/nginx/html
    EXPOSE 80
    COPY --from=build ./app/createenv.sh ./app/createenv.sh
    RUN chmod +x ./app/createenv.sh
    COPY entrypoint.sh /entrypoint.sh
    RUN chmod +x /entrypoint.sh
    ENTRYPOINT ["sh", "/entrypoint.sh"]
    CMD ["nginx", "-g", "daemon off;"]


    NGINX Config

    Nothing fancy here — just the usual single-page app fallback:

    server {
        listen 80;
        server_name localhost;
    
        root /usr/share/nginx/html;
        index index.html;
    
        location / {
            try_files $uri $uri/ /index.html;
        }
    }


    How the React App Accesses window.env

    In your React app, you can safely read values like so:

    const backendUrl = window.env?.BACKEND_URL;


    You can even create a small utility wrapper:

    export const config = {
      backendUrl: window.env?.BACKEND_URL,
      imageEndpoint: window.env?.IMAGE_ENDPOINT,
    };


    Just make sure env.js is loaded before your React app.

    Azure Container Apps: Setting Env Vars

    When deploying to Azure, environment variables can be configured in the Azure Portal under your Container App > Containers > Environment Variables, or via CLI:

    az containerapp update \
      --name my-react-app \
      --resource-group my-group \
      --set-env-vars BACKEND_URL=https://api.example.com STORAGE_ACCOUNT_NAME=mystorage STORAGE_CONTAINER_NAME=public


    These values will be picked up by createenv.sh at container start.

    Wrap-up & Takeaways

    • React apps are static and can’t read server env vars directly
    • To inject dynamic config, generate a global env.js at container startup
    • Use a shell script and a lightweight entrypoint setup
    • Works great with Azure Container Apps and Docker
    • No rebuilds needed when config values change

    Call to Action

    Are you doing something similar — or maybe even cooler — in your frontend deployments? I’d love to hear about it. Share your ideas or problems on GitHub or hit me up on oliverscheer.tech!

  • Embedding Static Data in C#: How to Pack Markdown, CSV, and Prompt Templates into Your Application

    Embedding Static Data in C#: How to Pack Markdown, CSV, and Prompt Templates into Your Application

    Introduction

    Whether you’re building an AI-powered app that needs rich prompt templates, a dashboard fed by CSV configuration data, or a Markdown-based documentation viewer — sooner or later, you’ll want to embed static content directly into your C# application.

    In this article, I’ll walk you through different approaches for embedding larger static assets like .md or .csv files into a .NET application. You’ll learn the pros and cons of each technique, and how to pick the right one depending on your use case.


    Why Embed Static Files at All?

    Let’s face it — hardcoding large strings or data blobs into your C# code is painful. Imagine stuffing a 200-line Markdown prompt into a multiline string with escaped quotes and newlines. Yikes.

    Embedding static files like .md.csv.json, or .txt in their original format offers major advantages:

    • Readability: You keep your C# code clean and uncluttered.
    • Editability: Non-developers (or your future self) can easily tweak content in separate files.
    • Version Control: Changes are trackable and meaningful in Git.
    • No hacks: Avoids weird string formatting, code bloat, or ugly @"" literals.

    In short: separating data from code is good software design — and embedding lets you do that while still keeping everything neatly bundled in your app.


    Solution: Embedding Static Files in C

    Let’s look at the three most useful approaches in .NET:

    1. Embedded Resources: Reliable and Portable

    With embedded resources, you include files directly in your compiled assembly. This means they travel with your .dll or .exe, no matter where your app runs.

    Here’s a simple helper class to load them:

    public class EmbeddedResourceHelper
    {
        public static string GetEmbeddedResource(Assembly assembly, string resourceName)
        {
            Stream resourceStream = assembly.GetManifestResourceStream(resourceName)
                ?? throw new ArgumentException($"Resource '{resourceName}' not found in assembly '{assembly.FullName}'.");
            using StreamReader reader = new(resourceStream);
            return reader.ReadToEnd();
        }
    }


    How to use it

    1. Add your file (e.g., PromptTemplate.md) to your project.
    2. Set its Build Action to Embedded Resource.
    3. Load it at runtime like this:
    string prompt = EmbeddedResourceHelper.GetEmbeddedResource(
        Assembly.GetExecutingAssembly(),
        "YourNamespace.PromptTemplate.md"
    );


    🔍 Tip: Use Assembly.GetExecutingAssembly().GetManifestResourceNames() to list all embedded resources for debugging.

    ✅ Pros

    • No risk of missing files in production
    • Clean packaging: everything is in your .dll
    • Works cross-platform and in all deployment scenarios

    ❌ Cons

    • You must know the full resource name (namespace + filename)
    • Not editable after build — but that’s often a feature, not a bug:In many cases (like AI prompts, templates, or system defaults), the content is part of the app logic and shouldn’t change at runtime.

    💡 Pro Tip: Static ≠ Editable — and That’s OK

    Embedded resources are not meant to be edited after deployment. And that’s often a good thing!

    • Prompt templates for AI models? You don’t want those drifting between environments.
    • Markdown-based email templates? Better to version and test them properly.
    • CSV lookup tables with default values? They belong to the app logic, not runtime config.

    If your content is part of the application behavior, embedding ensures consistency and prevents accidental tampering. Think of it as versioned, immutable content — like code.


    2. Copy to Output Directory: Simple and Flexible

    If you want to keep the content editable after build — say, admins can change a CSV config file — just set the file’s Copy to Output Directory to Copy if newer.

    Then load the file like this:

    string markdown = File.ReadAllText("Templates/Prompt.md");


    ✅ Pros

    • Easier to edit without recompiling
    • Paths are simpler (especially in local dev)

    ❌ Cons

    • Can break in deployment if files are missing
    • Slightly more brittle for cross-platform apps

    3. Source Generators: Compile-Time Magic (Advanced)

    If you want to embed content and access it like a strongly-typed constant, you can use C# Source Generators.

    Example idea:

    • Scan .md files in a Templates/ folder at build time
    • Generate a static class with string properties for each file

    It’s a powerful approach — ideal for libraries or SDKs — but adds build complexity.


    Real-World Use Case: Prompt Templates for AI

    In one of my projects, I embedded multiple Markdown files as prompt templates for an AI chatbot. Each prompt was stored as a .md file (e.g. summarize.mdanalyze.md, etc.) and compiled as an embedded resource.

    Why?

    • I wanted the prompts to be version-controlled and tightly coupled with the code
    • Markdown gave me readable, structured prompts
    • Using EmbeddedResourceHelper, loading them was dead simple

    This way, I could tweak the prompts without worrying about missing files in production.


    Summary & Takeaways

    • Use embedded resources when you want bulletproof, self-contained deployments
    • Use output directory copying when you need runtime editability
    • Use source generators if you want compile-time constants and type safety
    • EmbeddedResourceHelper makes working with embedded files elegant and reusable

    What’s Your Strategy?

    Have you used embedded resources in a unique way — maybe for theming, email templates, or config data?
    I’d love to hear how you’re handling static files in C#!

    → Drop me a message on GitHub or check out more dev tips on oliverscheer.tech.

  • Create Lottie Animations in React

    Create Lottie Animations in React

    Effortless Animations in React with Lottie: A Step-by-Step Guide

    Introduction

    As developers, we’re always searching for ways to elevate user experiences in our web applications. Animations can be a game-changer—they breathe life into interfaces, making them more engaging and intuitive. Yet, implementing high-quality animations often comes with challenges: bloated file sizes, laggy performance, and limited interactivity. This is where Lottie steps in.

    In this guide, I’ll introduce you to Lottie, an open-source library that allows you to add delightful, lightweight, and scalable animations to your React apps. By the end of this article, you’ll know how to integrate Lottie animations into your project and understand why they’re a superior alternative to traditional GIFs or videos.


    The Problem: Why Animations Are Tricky

    Animations are a powerful tool for improving user engagement, but they come with inherent challenges:

    1. Performance Issues
      GIFs and videos can be resource-intensive, especially on mobile devices or slower networks. They often result in higher page load times and reduced responsiveness.
    2. File Size
      High-quality animations (e.g., HD GIFs) tend to be large, bloating your app and increasing bandwidth usage.

    3. Limited Control
      Traditional formats like GIFs offer little to no interactivity. You can’t pause, reverse, or dynamically adjust their playback.

    4. Cross-Platform Compatibility
      Ensuring consistent behavior across web, iOS, and Android apps can feel like an uphill battle.

    This is where Lottie shines. It uses JSON-based animation files, which are lightweight, vector-based, and fully customizable.


    What is Lottie?

    Lottie is an open-source animation library developed by Airbnb. It takes animations created in Adobe After Effects, exports them as JSON files using the Bodymovin plugin, and renders them in your app using platforms like Web, iOS, Android, and React Native.

    Why Choose Lottie?

    Here are the key advantages of using Lottie animations:

    • Lightweight: JSON files are significantly smaller than GIFs or videos.
    • Scalable: Since animations are vector-based, they look sharp on all screen sizes.
    • Interactive: You can control playback, loops, speed, and even trigger animations programmatically.
    • Cross-Platform: The same JSON file works seamlessly across web, mobile, and other platforms.
    • Open-Source: Free to use with a thriving community of contributors.

    How to Use Lottie in React

    Now that we’ve established why Lottie is awesome, let’s dive into how to implement it in a React project.

    Step 1: Install the Required Library

    Lottie provides an official React wrapper called lottie-react. To install it, run the following command in your project:

    npm install lottie-react
    

    If you’re working with TypeScript, you might want to install type definitions as well:

    npm install --save-dev @types/lottie-react
    

    Step 2: Add a Lottie Animation to Your Component

    Here’s a simple example of how to integrate a Lottie animation into your React app:

    Code Example: Loading Animation Component

    import { useEffect, useState } from "react";
    import Lottie from "lottie-react";

    const LottieLoading = () => {
    const [animationData, setAnimationData] = useState(null);

    useEffect(() => {
    // Dynamically import the JSON file
    import("./loading-squares.json")
    .then((data: any) => {
    setAnimationData(data.default);
    })
    .catch(error => console.error("Error loading Lottie JSON:", error));
    }, []);

    if (!animationData) {
    return <p>Loading...</p>; // Fallback UI while JSON is being fetched
    }

    return (
    <div style={{ width: 300, height: 300 }}>
    <Lottie animationData={animationData} loop={true} />
    </div>
    );
    };

    export default LottieLoading;

    Key Features Explained

    1. Dynamic Import
      The animation JSON file is loaded dynamically using import() inside the useEffect hook. This ensures the animation isn’t bundled into your main JavaScript file, keeping your app lightweight.
    2. Fallback UI
      While the animation data is being fetched, a simple <p> tag is displayed as a fallback. This ensures a smooth user experience.

    3. Customizable Playback
      The <Lottie /> component lets you control specific behaviors like looping (loop={true}), speed, and even interaction.


    Step 3: Best Practices for Using Lottie

    To get the most out of Lottie, follow these tips:

    • Use Vectors: When creating animations in Adobe After Effects, ensure you’re using vector shapes for optimal performance and scalability.
    • Optimize JSON Files: Before using your animations in production, test and optimize them on LottieFiles.
    • Lazy Load Animations: Avoid bundling large JSON files with your app; load them dynamically as needed.
    • Interactive Use Cases: Combine Lottie animations with user interactions (e.g., button clicks or scroll events) to create engaging experiences.

    Real-World Use Case: Interactive Loading Screen

    Imagine you’re building an e-commerce site. You can use Lottie to implement an interactive loading animation that keeps users engaged while their product search results are being fetched.

    Benefits:

    • Boost Engagement: Users are less likely to bounce during loading screens.
    • Professional Look: High-quality animations make your app stand out.
    • Performance: Lottie’s lightweight JSON files ensure fast load times.

    With the code example above, you can easily implement such a loading screen in your React app.


    Conclusion

    Lottie is a game-changing tool for developers looking to integrate high-quality animations into their projects. By leveraging vector-based JSON files and the flexibility of libraries like lottie-react, you can create stunning, performant, and interactive experiences for your users.

    Key Takeaways:

    • Lottie animations are lightweight, scalable, and interactive.
    • They work seamlessly across web and mobile platforms.
    • Using Lottie in React is straightforward with the lottie-react library.

    Call-to-Action

    Ready to take your web app to the next level? Start experimenting with Lottie animations today! Whether you’re creating captivating loading screens, playful illustrations, or dynamic interactions, Lottie has the tools you need.

    Have questions or want to share your experience? Drop a comment below or explore more examples at LottieFiles.

    Happy coding! 🚀

    Samples

  • Year in Code: Reflecting on 2024

    Year in Code: Reflecting on 2024

    As the year comes to a close, I find myself reflecting on a whirlwind year of coding, creating, and learning. This is my first-ever year-in-review post, so here’s a little recap of my journey through software development in 2024.

    Visualizing My Contributions

    Thanks to some fantastic tools, I could easily track my coding contributions this year—at least on GitHub!

    • https://git-wrapped.com
    • https://www.githubwrapped.io

    The visuals look great, though I did notice one curious insight: apparently, I’ve coded in Vue.js? Spoiler: I haven’t written a single line in Vue.js this year. Maybe Blazor doesn’t get enough recognition? A reminder to always take stats with a grain of salt!

    The visuals look great, though I did notice one curious insight: apparently, I’ve coded in Vue.js? Spoiler: I haven’t written a single line in Vue.js this year. Maybe Blazor doesn’t get enough recognition? A reminder to always take stats with a grain of salt!

    Technical Highlights

    This year has been packed with exciting projects and milestones. Here are some of my personal technical highlights:

    1. Building My First Copilot
      In collaboration with a fantastic team, I developed a copilot that can be trained and queried live. This was a challenging yet rewarding experience, leveraging the power of .NET.
    2. Real-Time Global Connectivity
      I worked on connecting highly technical machines that could be monitored and regulated in real time, even across countries and continents. This involved:
      • Azure DevOps
      • Azure IoT Hub
      • Stream Analytics
      • Power BI
      • .NET
    3. A Trip Down Memory Lane
      Revisiting older tech like Delphi and MySQL was like catching up with old friends. I helped port legacy systems to modern solutions using:
      • GitHub
      • Azure
      • Azure SQL
      • .NET
      • Blazor

    Technologies I Used in 2024

    Here’s a rundown of the tools and technologies I’ve worked with this year:

    • Azure IoT Hub
    • Stream Analytics
    • Power BI
    • React
    • Blazor
    • .NET
    • C#
    • GitHub Actions
    • Azure DevOps
    • OpenAI / ChatGPT
    • PHP
    • Delphi (formerly Turbo Pascal)
    • … and more!

    Closing Thoughts

    2024 was an exciting and intense year, both technically and personally. As always, I’ve learned so much, and I’m looking forward to carrying those lessons into the new year. But for now, it’s time to power down and recharge.

    Here’s to a fresh start in 2025. Wishing you all a wonderful new year filled with growth, innovation, and success.

    All the best,
    Oliver

  • OpenAPI Documentation in .NET 9

    OpenAPI Documentation in .NET 9

    Introduction to OpenAPI in ASP.NET Core 9

    With the release of .NET 9, the ASP.NET Core team has decided to remove built-in Swagger support (Swashbuckle) for several key reasons:

    • Maintenance Challenges: Swashbuckle is no longer actively maintained, lacks updates, and doesn’t have an official release for .NET 8.
    • Native Metadata Support: ASP.NET Core now includes built-in metadata to describe APIs, reducing the need for external tools.
    • Focus on OpenAPI: Microsoft is enhancing OpenAPI support natively with Microsoft.AspNetCore.OpenApi to provide seamless documentation generation.
    • Modern Alternatives: Tools like .http files and the Endpoints Explorer in Visual Studio allow testing and exploration without relying on third-party packages.
    • Encouraging Innovation: Removing Swashbuckle as a default encourages community-driven tools that better suit developer needs.

    This project demonstrates how to adapt to these changes by leveraging modern alternatives and provides practical examples to help you get started.

    What’s Included in This Project

    To help developers transition to the new direction of ASP.NET Core 9, this repository includes three samples:

    1. Using .http Files: A lightweight and modern way to test APIs in Visual Studio and VS Code.
    2. Re-adding Swagger Support: A sample for those who still want to use Swagger (Swashbuckle) for API documentation.
    3. Introducing Scalar: A powerful alternative to Swagger with additional features, a modern UI, and rich API exploration capabilities.

    Using .http Files

    .http files allow you to define and test HTTP requests directly from your editor, such as Visual Studio Code with the REST Client extension or Visual Studio.

    Why .http Files?

    • Lightweight, simple, and human-readable.
    • Allows quick testing of endpoints.
    • Supports variables and response reuse in Visual Studio Code.

    Example: A Simple .http File

    @hostaddress = https://localhost:5555/calculation
    @value1 = 20
    @value2 = 22
    
    ### Add Request
    # @name add
    POST {{hostaddress}}/add
    Content-Type: application/json
    
    {
      "value1": {{value1}},
      "value2": {{value2}}
    }
    
    ### Reuse Response
    @addresult = {{add.response.body.result}}
    
    POST {{hostaddress}}/add
    Content-Type: application/json
    
    {
      "value1": {{addresult}},
      "value2": {{addresult}}
    }
    

    Notes:

    • In Visual Studio Code, the REST Client extension supports variables and response reuse (e.g., add.response.body.result).
    • In Visual Studio, response variables are not yet supported, but you can still execute requests and debug effectively.

    Example UI in Visual Studio:

    HTTP-File in Visual Studio


    Re-Adding Swagger Support

    While Swagger has been removed from .NET 9, you can easily add it back using Swashbuckle.

    Steps to Add Swagger:

    1. Install Required NuGet Packages:

      dotnet add package Microsoft.AspNetCore.OpenApi
      dotnet add package Swashbuckle.AspNetCore
      
    2. Update Program.cs:

      builder.Services.AddSwaggerGen(options =>
      {
          options.SwaggerDoc("v1", new OpenApiInfo
          {
              Title = "Sample API",
              Version = "v1",
              Description = "API to demonstrate Swagger integration."
          });
      });
      
      // some code
      
      if (app.Environment.IsDevelopment())
      {
          app.UseSwagger();
          app.UseSwaggerUI();
      }
      

    Swagger UI Preview:

    Swagger provides a clear interface to explore and test your API endpoints.

    Swagger UI

    Swagger UI


    Introducing Scalar: A Modern Alternative

    Scalar is an open-source API platform that takes API documentation and testing to the next level. It offers modern features, an intuitive user experience, and a sleek interface (with dark mode for real engineers!).

    Why Use Scalar?

    • Modern REST Client: Test and interact with APIs seamlessly.
    • Beautiful API References: Generates clean, readable API documentation.
    • Code Generation: Generate samples in 25+ languages or frameworks.

    Scalar Example Output

    C# Example:

    using System.Net.Http.Headers;
    
    var client = new HttpClient();
    var request = new HttpRequestMessage
    {
        Method = HttpMethod.Get,
        RequestUri = new Uri("https://localhost:5555/api/v1/time"),
    };
    using (var response = await client.SendAsync(request))
    {
        response.EnsureSuccessStatusCode();
        var body = await response.Content.ReadAsStringAsync();
        Console.WriteLine(body);
    }
    

    JavaScript/jQuery Example:

    const settings = {
      async: true,
      crossDomain: true,
      url: 'https://localhost:5555/api/v1/time',
      method: 'GET',
      headers: {}
    };
    
    $.ajax(settings).done(function (response) {
      console.log(response);
    });
    

    Adding Scalar to Your Project

    1. Install Scalar NuGet Package:

      dotnet add package Scalar.AspNetCore
      
    2. Update Program.cs:

      if (app.Environment.IsDevelopment())
      {
          app.MapScalarApiReference();
      }
      

    Scalar UI Preview

    scalar 1 scalar 2

    Summary

    With .NET 9, Microsoft has shifted focus to native OpenAPI support, removing the dependency on Swashbuckle. However, with .http files, Swagger, and Scalar, you have powerful tools at your disposal:

    1. Use .http files for lightweight API testing.
    2. Re-integrate Swagger for familiar interactive documentation.
    3. Explore Scalar for a modern, feature-rich alternative with advanced capabilities.

    Source Code

    Find all samples in the GitHub repository: OpenAPI Documentation in .NET 9.

  • Make Stand-Ups Count: 8 Essential Tips for Effective Meetings

    Stand-up meetings are meant to be brief and productive. The goal is to align your team quickly without diving into long discussions or unnecessary details. To help you get the most out of your stand-ups, here are eight practical tips to keep your meetings sharp and purposeful:

    1. Focus on team-wide relevance – Share updates that matter to the entire group, not just a subset of members.
    2. Get to the point – Avoid long-winded explanations; be concise and clear.
    3. Be ready to share and lead – Come prepared with key updates and questions to guide the discussion effectively.
    4. Keep quick solutions brief – If a solution emerges during the meeting, keep it under 30 seconds or take it offline.
    5. Listen with intent – Actively hear what your team has to say, ensuring no key updates are missed.
    6. Show up on time – Respect everyone’s schedule by being punctual and prepared.
    7. Speak up when needed – Don’t hesitate to voice concerns or challenges that impact progress.
    8. Bring positive energy – Inspire your team by maintaining an encouraging attitude and highlighting achievements.

    By implementing these habits, you’ll keep your stand-ups efficient and ensure every moment spent adds value to your team’s collaboration and progress.

  • Local Development with Aspire, Blazor & SQL Server in a container

    Local Development with Aspire, Blazor & SQL Server in a container

    Aspire is a powerful tool that enhances the developer experience and boosts productivity. Developers generally prefer focusing on writing code rather than managing every aspect of a solution’s infrastructure, especially for components they aren’t actively working on. Setting up things like a local database server or configuring complex environments can be tedious and distracting from the core task of coding.

    In this example, I’ll show you how to seamlessly integrate a local SQL Server in a Docker container, allowing you to run your application with minimal setup and zero friction.

    To follow this small tutorial, I expect that you already have an Aspire Solution prepared. Including docker.

    To add a SQL Server to you Aspire Solution, only the following code is required in Program.cs of the AppHost.

    var builder = DistributedApplication.CreateBuilder(args);
    var password = builder.AddParameter("SqlServerSaPassword", secret: true);
    
    // The database server including the db called "sqldb"
    var sql = builder.AddSqlServer("sql", password);
    var sqldb = sql.AddDatabase("sqldb");
    
    // The Blazor App
    builder
        .AddProject<Projects.Customer_Web>("customer-web")
        .WithReference(sqldb);
    
    builder. Build().Run();
    

    Because the password is „critical“ it should not appear in the code directly. It is stored in the appsettings.json file.

    {
      "Logging": {
        "LogLevel": {
          "Default": "Information",
          "Microsoft.AspNetCore": "Warning",
          "Aspire.Hosting.Dcp": "Warning"
        }
      },
      "Parameters": {
        "SqlServerSaPassword": "topSecret#2024"
      }
    }
    

    To connect the Blazor app to the database, simply add the following code in Program.cs.

    string connectionString = builder.Configuration.GetConnectionString("sqldb"); 
    builder.Services.AddDbContext&lt;AppDbContext>(options => options.UseSqlServer(connectionString));
    

    Just press F5 and you have …


    If this is your first time pulling a SQL Server container, you’ll notice the container named ’sql‘ remains in starting up mode in the Resource List for a few moments. You can track the pull progress from the container registry by viewing the logs under Actions. The speed of this process depends on your internet connection.To connect locally to the running SQL container using a tool like Azure Data Studio, you’ll need details like port numbers and container mappings. Simply click on the container (as shown in the image above) to view these details.

    Azure Data Studio is a free and platform independent tool for working with common Databases locally and on Azure. You can download it here: Download.

    Use this information in the connection dialog of the Azure Data Studio tool.

    With that you have a connection to your local SQL Server.

    Summary

    With this approach you have a local environment with a SQL Server and Database up and running without any problems.

    You can find the code here on GitHub: oliverscheer/sample-customer-app: A sample app to demonstrate common features

  • Simplify Debugging with the [DebuggerDisplay] Attribute in C#

    Simplify Debugging with the [DebuggerDisplay] Attribute in C#

    When working with complex classes in C#, the default debugger view can often overwhelm you with unnecessary details. Enter the [DebuggerDisplay] attribute—a simple yet powerful tool to make debugging more intuitive.

    What Is [DebuggerDisplay]?

    The [DebuggerDisplay] attribute allows you to customize how your classes and properties appear in the debugger. By overriding the default representation, you can display only the most relevant information at a glance.

    Basic Usage

    Here’s how you can use the [DebuggerDisplay] attribute:

    [DebuggerDisplay("Id = {Id}, Name = {Name}")]
    public class Person
    {
        public int Id { get; set; }
        public string Name { get; set; }
        public string Email { get; set; }
    }


    In this example:

    • The debugger will display: Id = 1, Name = John Doe when inspecting a Person object.
    • Unnecessary details like Email are omitted.

    Dynamic Expressions

    You can use expressions within the curly braces {} for dynamic values. For example:

    [DebuggerDisplay("FullName = {FirstName + \" \" + LastName}")]
    public class Employee
    {
        public string FirstName { get; set; }
        public string LastName { get; set; }
    }


    Best Practices

    • Keep it simple: Include only the most relevant fields or properties.
    • Avoid heavy logic: Expressions in [DebuggerDisplay] are evaluated during debugging, which can affect performance.
    • Fallback to ToString(): If more customization is needed, override ToString() and use [DebuggerDisplay("{ToString()}")].

    Why Use It?

    By streamlining what you see during debugging, [DebuggerDisplay] saves you time, reduces clutter, and helps focus on what matters most. It’s an essential attribute for any developer aiming to improve debugging efficiency.

    Here is a view, how it looks in action:


    Try adding [DebuggerDisplay] to your classes and experience the difference in your next debugging session!

  • Simple Data Seeding with Entity Framework my preferred way

    Simple Data Seeding with Entity Framework my preferred way

    A common challenge in developing database solutions is the insertion and updating of master data. By master data, I mean information such as titles („Mr.“, „Ms.“, „Prof.“, etc.), product categories („Food“, „Tools“, „Services“), or the list of all countries in the world – useful, for example, in address capturing.

    Staying up-to-date with master data without much effort

    How can you get this data into the database and keep it current without a high level of effort?

    In this example, I will show you how all the countries of the world with their official abbreviation codes are automatically entered into a table when creating the database — either during the initial creation or during a migration of the database. You will learn how to further simplify the work involved in database creation and migrations in another blog post.

    Using Entity Framework for easy master data collection

    Fortunately, Entity Framework provides helpful functions, which I would like to demonstrate through my code.

    For this example, I have stored a list of all countries in a class with constants. I generated the list of all countries and their abbreviations using GitHub Copilot — so if there are any errors, please blame Copilot, not me 😉

    public static class Countries
    {
        public static Dictionary<string, string> All = new Dictionary<string, string>
            {
                { "Afghanistan", "AF" },
                { "Albania", "AL" },
                { "Algeria", "DZ" },
                { "Andorra", "AD" },
                { "Angola", "AO" },
                { "Antigua and Barbuda", "AG" },
                { "Argentina", "AR" },
                { "Armenia", "AM" },
                { "Australia", "AU" },
                { "Austria", "AT" },
                { "Azerbaijan", "AZ" },
                { "Bahamas", "BS" },
                { "Bahrain", "BH" },
                { "Bangladesh", "BD" },
                { "Barbados", "BB" },
                { "Belarus", "BY" },
                { "Belgium", "BE" },
                { "Belize", "BZ" },
                { "Benin", "BJ" },
                { "Bhutan", "BT" },
                { "Bolivia", "BO" },
                { "Bosnia and Herzegovina", "BA" },
                { "Botswana", "BW" },
                { "Brazil", "BR" },
                { "Brunei", "BN" },
                { "Bulgaria", "BG" },
                { "Burkina Faso", "BF" },
                { "Burundi", "BI" },
                { "Cabo Verde", "CV" },
                { "Cambodia", "KH" },
                { "Cameroon", "CM" },
                { "Canada", "CA" },
                { "Central African Republic", "CF" },
                { "Chad", "TD" },
                { "Chile", "CL" },
                { "China", "CN" },
                { "Colombia", "CO" },
                { "Comoros", "KM" },
                { "Congo, Democratic Republic of the", "CD" },
                { "Congo, Republic of the", "CG" },
                { "Costa Rica", "CR" },
                { "Croatia", "HR" },
                { "Cuba", "CU" },
                { "Cyprus", "CY" },
                { "Czech Republic", "CZ" },
                { "Denmark", "DK" },
                { "Djibouti", "DJ" },
                { "Dominica", "DM" },
                { "Dominican Republic", "DO" },
                { "Ecuador", "EC" },
                { "Egypt", "EG" },
                { "El Salvador", "SV" },
                { "Equatorial Guinea", "GQ" },
                { "Eritrea", "ER" },
                { "Estonia", "EE" },
                { "Eswatini", "SZ" },
                { "Ethiopia", "ET" },
                { "Fiji", "FJ" },
                { "Finland", "FI" },
                { "France", "FR" },
                { "Gabon", "GA" },
                { "Gambia", "GM" },
                { "Georgia", "GE" },
                { "Germany", "DE" },
                { "Ghana", "GH" },
                { "Greece", "GR" },
                { "Grenada", "GD" },
                { "Guatemala", "GT" },
                { "Guinea", "GN" },
                { "Guinea-Bissau", "GW" },
                { "Guyana", "GY" },
                { "Haiti", "HT" },
                { "Honduras", "HN" },
                { "Hungary", "HU" },
                { "Iceland", "IS" },
                { "India", "IN" },
                { "Indonesia", "ID" },
                { "Iran", "IR" },
                { "Iraq", "IQ" },
                { "Ireland", "IE" },
                { "Israel", "IL" },
                { "Italy", "IT" },
                { "Jamaica", "JM" },
                { "Japan", "JP" },
                { "Jordan", "JO" },
                { "Kazakhstan", "KZ" },
                { "Kenya", "KE" },
                { "Kiribati", "KI" },
                { "Korea, North", "KP" },
                { "Korea, South", "KR" },
                { "Kosovo", "XK" },
                { "Kuwait", "KW" },
                { "Kyrgyzstan", "KG" },
                { "Laos", "LA" },
                { "Latvia", "LV" },
                { "Lebanon", "LB" },
                { "Lesotho", "LS" },
                { "Liberia", "LR" },
                { "Libya", "LY" },
                { "Liechtenstein", "LI" },
                { "Lithuania", "LT" },
                { "Luxembourg", "LU" },
                { "Madagascar", "MG" },
                { "Malawi", "MW" },
                { "Malaysia", "MY" },
                { "Maldives", "MV" },
                { "Mali", "ML" },
                { "Malta", "MT" },
                { "Marshall Islands", "MH" },
                { "Mauritania", "MR" },
                { "Mauritius", "MU" },
                { "Mexico", "MX" },
                { "Micronesia", "FM" },
                { "Moldova", "MD" },
                { "Monaco", "MC" },
                { "Mongolia", "MN" },
                { "Montenegro", "ME" },
                { "Morocco", "MA" },
                { "Mozambique", "MZ" },
                { "Myanmar", "MM" },
                { "Namibia", "NA" },
                { "Nauru", "NR" },
                { "Nepal", "NP" },
                { "Netherlands", "NL" },
                { "New Zealand", "NZ" },
                { "Nicaragua", "NI" },
                { "Niger", "NE" },
                { "Nigeria", "NG" },
                { "North Macedonia", "MK" },
                { "Norway", "NO" },
                { "Oman", "OM" },
                { "Pakistan", "PK" },
                { "Palau", "PW" },
                { "Palestine", "PS" },
                { "Panama", "PA" },
                { "Papua New Guinea", "PG" },
                { "Paraguay", "PY" },
                { "Peru", "PE" },
                { "Philippines", "PH" },
                { "Poland", "PL" },
                { "Portugal", "PT" },
                { "Qatar", "QA" },
                { "Romania", "RO" },
                { "Russia", "RU" },
                { "Rwanda", "RW" },
                { "Saint Kitts and Nevis", "KN" },
                { "Saint Lucia", "LC" },
                { "Saint Vincent and the Grenadines", "VC" },
                { "Samoa", "WS" },
                { "San Marino", "SM" },
                { "Sao Tome and Principe", "ST" },
                { "Saudi Arabia", "SA" },
                { "Senegal", "SN" },
                { "Serbia", "RS" },
                { "Seychelles", "SC" },
                { "Sierra Leone", "SL" },
                { "Singapore", "SG" },
                { "Slovakia", "SK" },
                { "Slovenia", "SI" },
                { "Solomon Islands", "SB" },
                { "Somalia", "SO" },
                { "South Africa", "ZA" },
                { "South Sudan", "SS" },
                { "Spain", "ES" },
                { "Sri Lanka", "LK" },
                { "Sudan", "SD" },
                { "Suriname", "SR" },
                { "Sweden", "SE" },
                { "Switzerland", "CH" },
                { "Syria", "SY" },
                { "Taiwan", "TW" },
                { "Tajikistan", "TJ" },
                { "Tanzania", "TZ" },
                { "Thailand", "TH" },
                { "Timor-Leste", "TL" },
                { "Togo", "TG" },
                { "Tonga", "TO" },
                { "Trinidad and Tobago", "TT" },
                { "Tunisia", "TN" },
                { "Turkey", "TR" },
                { "Turkmenistan", "TM" },
                { "Tuvalu", "TV" },
                { "Uganda", "UG" },
                { "Ukraine", "UA" },
                { "United Arab Emirates", "AE" },
                { "United Kingdom", "GB" },
                { "United States", "US" },
                { "Uruguay", "UY" },
                { "Uzbekistan", "UZ" },
                { "Vanuatu", "VU" },
                { "Vatican City", "VA" },
                { "Venezuela", "VE" },
                { "Vietnam", "VN" },
                { "Yemen", "YE" },
                { "Zambia", "ZM" },
                { "Zimbabwe", "ZW" }
            };
    }

    My DbContext looks as follows:

    pulic class AdminDbContext : DbContext
    {
        public AdminDbContext(DbContextOptions<AdminDbContext> options)
            : base(options)
        {
        }
    
        public DbSet<GroupEntity> Groups { get; init; } = default!;
    
        public DbSet<MemberEntity> Members { get; init; } = default!;
        
        public DbSet<CountryEntity> Countries { get; init; } = default!;
    
    }

    My DbContext looks as follows:

    
    [EntityTypeConfiguration(typeof(CountryEntityConfiguration))]
    public class CountryEntity 
    {
        [Key]
        [StringLength(2)]
        public string Id { get; set; } = default!;
        public string Name { get; set; } = default!;
    }

    This entity consists of only two properties, namely the Id and the name of the country. The Id key is simultaneously the Country Code and must never be longer than two characters. The most interesting part of this class lies in the attribute EntityTypeConfiguration. This attribute accepts another class as its type: CountryEntityConfiguration.

    In the file CountryEntityConfiguration, the entity is described in detail. This combination does exactly what has previously been done in the OnModelCreating event in the DbContext.

    public class CountryEntityConfiguration: IEntityTypeConfiguration<CountryEntity>
    {
        public void Configure(EntityTypeBuilder<CountryEntity> builder)
        {
            string tableName = "Countries";
            builder.ToTable(tableName, "dbo");
    
            // Unique Index
            // No duplicate Country Name allowed
            builder
                .HasIndex(c => c.Name)
                .IsUnique();
    
            // Seeding All Countries
            List<CountryEntity> countryEntities = [];
            foreach (var country in Countries.All)
            {
                CountryEntity countryEntity = new()
                {
                    Id = country.Value,
                    Name = country.Key
                };
                countryEntities.Add(countryEntity);
            }
            
            builder.HasData(
                countryEntities
            );
        }
    }

    By using this, if you create a migration or regenerate the database using DbContext.Database.EnsureCreated(), you will get a populated table with all the countries of the world.

    I hope you learned something new, happy auto-fill your database with entity framework.

  • LocalDB is not supported on this platform called Ubuntu

    LocalDB is not supported on this platform called Ubuntu

    Experimenting with Ubuntu and Rider has been insightful, revealing that not everything is easier on Linux. One example? SQL Server Express. While it comes free with any Visual Studio setup on Windows, it isn’t available by default on Ubuntu.

    Luckily, there are several ways to solve this problem. You could install the Linux version of SQL Server Express locally—or take the easier route and run it in a container.

    Option 1: Complete Local Installation

    A local installation lets you have SQL Server Express on your machine all the time, but it comes with a few drawbacks. The setup can be complex, requiring additional dependencies like LDAP libraries, which quickly add up. If, like me, you prefer a clean development environment, a full installation isn’t ideal.

    Option 2: SQL Server Express in a Container

    The container option is much simpler. You only run SQL Server Express when needed, without cluttering your environment. Here’s the setup script I used:

    docker pull mcr.microsoft.com/mssql/server:2022-latest
    
    docker run -e "ACCEPT_EULA=Y" -e "MSSQL_SA_PASSWORD=topSecret#2024" \
       -p 1433:1433 \
       --hostname sql1 \
       -d mcr.microsoft.com/mssql/server:2022-latest
    
    docker ps

    Updating Your Connection String

    If you’re working with Rider or Visual Studio, you’ll need to update the connection string for the container-based server. Here’s how:

    {
        "ConnectionStrings": {
        "AdminDbContextWindows": "Data Source=(localdb)\\MSSQLLocalDB;Initial Catalog=SampleDb;Integrated Security=True;Connect Timeout=30;Encrypt=False;Trust Server Certificate=False;Application Intent=ReadWrite;Multi Subnet Failover=False;Max Pool Size=1000;",
        "AdminDbContextLinux": "Data Source=(localdb)\\MSSQLLocalDB;Initial Catalog=SampleDb;Integrated Security=True;Connect Timeout=30;Encrypt=False;Trust Server Certificate=False;Application Intent=ReadWrite;Multi Subnet Failover=False;Max Pool Size=1000;",
        "AdminDbContext":   "Server=tcp:127.0.0.1,1433;Initial Catalog=SampleDb;User ID=sa;Password=topSecret#2024;Connection Timeout=30;Encrypt=True;TrustServerCertificate=true;"
      }
    }

    Note: Never commit sensitive information, like credentials, to version control. For production apps, consider using secure storage like AppSecrets.

    Wrapping Up

    With SQL Server Express running in a container, you can enjoy SQL development on Ubuntu without the hassle of a full installation. Happy coding!

  • Login to Azure in a GitHub Action

    I’m creating solutions on GitHub for Azure, aiming to deploy them easily via GitHub Actions. To achieve this, you need to authorize GitHub securely, and writing credentials directly in the pipeline is not recommended.

    A better approach is to use a Service Principal and store the credentials as a GitHub Secret.

    If you prefer using Managed Identities, this is also possible but requires your own build agents. The standard public build agents of GitHub do not support Managed Identities.

    Step 1 – Create a Service Principal with Azure CLI

    There are several ways to create a Service Principal, but my preferred method is using the Azure CLI tool `az`.

    $subscriptionId='<yoursubscriptionid>'
    $appName='<yourAppName>'
    $resourceGroup='<yourResourceGroupName>'
    
    az login
    az account set -s $subscriptionId
    az ad app create --display-name $appName
    az ad sp create-for-rbac --name $appName `
        --role contributor `
        --scopes /subscriptions/$subscriptionId//resourceGroups/$resourceGroup
    

    Save the result securely, you never get the `clientSecret` value again.

    {
      "clientId": "******",
      "clientSecret": "******",
      "subscriptionId": "******",
      "tenantId": "******",
      ...
    }
    

    You need exactly these four values; you can remove all others.

    Next, add the contributor role to this Service Principal. This allows the principal to create resources in an Azure Resource Group.

    az role assignment create --role contributor `
        --subscription $subscriptionId `
        --assignee-object-id $clientId `
        --assignee-principal-type ServicePrincipal `
        --scope /subscriptions/$subscriptionId/resourceGroups/$resourceGroup
    

    Step 2 – Store Azure Credentials in GitHub Secrets

    Take the JSON with the four values and go to GitHub –> Settings –> Secrets and Variables –> Actions –> Repository Settings. Add a new secret named `AZURE_CREDENTIALS`.

    You won’t be able to see these values again, but you can completely overwrite them with new values if needed.

    Step 3 – Use the Settings in GitHub Actions

    Use this secret to login within your GitHub Action.

    ```yaml
        - name: Azure Login
          uses: Azure/login@v2.0.0
          with:
            creds: ${{ secrets.AZURE_CREDENTIALS }}
    ```
    

    More Information

    The GitHub Action for Login into Azure: https://github.com/Azure/login

    Dokumentation: https://learn.microsoft.com/en-us/azure/developer/github/connect-from-azure

    Azure CLI Script: https://learn.microsoft.com/en-us/cli/azure/azure-cli-sp-tutorial-1?tabs=bash

  • Building a Data Driven App with Blazor and Fluent UI

    As some of my colleagues and friends may already know, I’m a live concert enthusiast. I think I’ve been to hundreds of concerts since the age of 14. But as I get older, it becomes more complicated to remember them all. That’s the idea behind this sample application. It might be a bit over-engineered, but it also serves as a demonstration project for using Blazor with ASP.NET Core and the Fluent Design Language.

    This project will demonstrate the following Blazor topics:
    – Navigation
    – URLs for pages
    – Displaying data
    – Editing data
    – Dialogs

    App Structure

    When you start from scratch, as I described in this [post](https://oliverscheer.net/posts/en/2024/06/05/getting-started-with-blazor-and-fluent/), you’ll have a quite simple project structure with a few sample pages. What I really like about Blazor is that you can structure your folders as you like, without affecting the final URL of the pages. This can be controlled completely independently.

    For example, the artists list of my application is in the folder `/Components/Pages/Artists/Index.razor`.

    In the code of this file, the `@page` attribute defines the route of this page. Some examples in the Razor file can look like this:

    @page "/artists"
    @page "/artist/{ItemID:guid}"
    @page "/artists"
    

    This leads to quite simple URLs for my page about `Artists`, such as https://www.myawesomeconcertdatabase.com/artists or https://www.myawesomeconcertdatabase.com/artist/123456.

    The following image describes the structure of the websites I build in this project. I also created some additional folders and files that contain more of the business logic, which we will discuss later.

    Navigation

    For navigation, it is quite common to use the hamburger menu with flyouts. The template uses this, and so do I.

    The navigation menu on the left side of the app can be configured via `NavMenu.razor`:

    @rendermode InteractiveServer
    
    &lt;div class="navmenu">
        &lt;input type="checkbox" title="Menu expand/collapse toggle" id="navmenu-toggle" class="navmenu-icon" />
        &lt;label for="navmenu-toggle" class="navmenu-icon">&lt;FluentIcon Value="@(new Icons.Regular.Size20.Navigation())" Color="Color.Fill" />&lt;/label>
        &lt;nav class="sitenav" aria-labelledby="main-menu" onclick="document.getElementById('navmenu-toggle').click();">
            &lt;FluentNavMenu Id="main-menu" Collapsible="true" Width="250" Title="Navigation menu" @bind-Expanded="expanded">
                &lt;FluentNavLink Href="/" Match="NavLinkMatch.All" Icon="@(new Icons.Regular.Size20.Home())" IconColor="Color.Accent">Home&lt;/FluentNavLink>
                &lt;FluentNavLink Href="artists" Icon="@(new Icons.Regular.Size20.BuildingLighthouse())" IconColor="Color.Accent">Artists&lt;/FluentNavLink>
                &lt;FluentNavLink Href="concerts" Icon="@(new Icons.Regular.Size20.People())" IconColor="Color.Accent">Concerts&lt;/FluentNavLink>
            &lt;/FluentNavMenu>
        &lt;/nav>
    &lt;/div>
    
    @code {
        private bool expanded = true;
    }
    

    The component `<FluentNavLink Href=“artists“ …>Artists</FluentNavLink>` will generate an `<a href>` to our artist page, which contains the path defined by `@page „/artists“`.

    `NavMenu` is just a part of another file called `MainLayout.razor`. This demonstrates quite well the way of building components in Blazor. The file `NavMenu.razor` is a component that is used in `MainLayout.razor` as the HTML tag `<NavMenu/>`, which I personally really like.

    MainLayout.razor:

    @inherits LayoutComponentBase
    
    <FluentLayout>
        <FluentHeader>
            Olivers Concert Database
        </FluentHeader>
        <FluentStack Class="main" Orientation="Orientation.Horizontal" Width="100%">
            <NavMenu />
            <FluentBodyContent Class="body-content">
                <div class="content">
                    @Body
                    <FluentDialogProvider @rendermode="RenderMode.InteractiveServer" />
                </div>
            </FluentBodyContent>
        </FluentStack>
        <FluentFooter>
           <a style="vertical-align:middle" href="https://www.medialesson.de" target="_blank">
                Made with
                <FluentIcon Value="@(new Icons.Regular.Size12.Heart())" Color="@Color.Warning" />
                by Medialesson
            </a>
        </FluentFooter>
    </FluentLayout>
    
    <div id="blazor-error-ui">
        An unhandled error has occurred.
        <a href="" class="reload">Reload</a>
        <a class="dismiss">🗙</a>
    </div>


    Display Data aka The Artists

    Please assume that we are using Entity Framework in combination with the repository pattern here. You can see the details of the implementation in the source code that I will reference at the end of this post.

    `Components/Pages/Artists/Index.razor`:

    @page "/artists"
    @using ConcertDatabase.Components.Pages.Artists.Panels
    @using ConcertDatabase.Entities
    @using ConcertDatabase.Repositories
    @inject IDialogService dialogService
    @inject ArtistRepository repository
    @inject NavigationManager navigationManager
    
    @rendermode InteractiveServer
    
    <h3>Artist List</h3>
    
    <FluentButton IconStart="@(new Icons.Regular.Size16.Add())" OnClick="@(() => AddInDialog())">Add</FluentButton>
    
    @if (artists != null)
    {
        <FluentDataGrid Items="@artists" TGridItem="Artist" Pagination="@pagination">
            <PropertyColumn Property="@(c => c.Name)" Sortable="true" />
            <PropertyColumn Property="@(c => c.Description)" Sortable="true" />
            <TemplateColumn Title="Actions">
                <FluentButton IconStart="@(new Icons.Regular.Size16.Edit())" OnClick="@(() => EditInDialog(context))" />
                <FluentButton IconStart="@(new Icons.Regular.Size16.DesktopEdit())" OnClick="@(() => EditInPanel(context))" />
                <FluentButton IconStart="@(new Icons.Regular.Size16.Delete())" OnClick="@(() => DeleteItem(context))" />
                <FluentButton IconStart="@(new Icons.Regular.Size16.Glasses())" OnClick="@(() => ShowItem(context))" />
            </TemplateColumn>
        </FluentDataGrid>
    
        <FluentPaginator State="@pagination" />
    }
    else
    {
        <p><em>Loading...</em></p>
    }
    
    @code {
        IQueryable<Artist>? artists;
        PaginationState pagination = new PaginationState { ItemsPerPage = 15 };
    
        protected override void OnInitialized()
        {
            LoadData();
        }
    
        private void LoadData()
        {
            artists = repository.Entities.ToList().AsQueryable();
        }
        ... more code  ...
    }


    Some explanations here:

    1. The code at the top defines the route with `@page`, imports some namespaces with `@using`, and injects some dependency services with `@inject`.

    2. It also defines the render mode. You can have different render modes in Blazor. `@rendermode InteractiveServer` enables interaction with server code.

    3. The `<FluentDataGrid>` is the table definition of what we want to render. It contains the data in the `Items` property and enables pagination.

    4. Several actions are defined to demonstrate some interesting features. These features are triggered through the `OnClick` event, which calls methods like `EditInDialog` with the current row’s data.

    5. The `@code` area is essentially the code-behind. You can create a separate code-behind file if you prefer.

    6. In the `@code` section, I define the variable `artists` and fill it in the `LoadData` method with data from a database.

    You can see the result of this little code snippet, which looks almost like pure HTML.

    Delete Existing Data

    I understand that not everyone is a fan of my music. I can tolerate that, most of the time. 🙂

    In case you want to delete an entry, you can click the delete symbol in the data grid. The code behind this method is in the `@code` section of the same file as the „HTML.“ You remember the `OnClick` event in the code above? This event calls the following C# function.

    private async Task DeleteItem(Artist item)
    {
        // Check if the item is null
        if (item is null)
        {
            return;
        }
    
        // Create and show a dialog to confirm the delete
        IDialogReference dialog = await dialogService.ShowConfirmationAsync(
            $"Are you sure you want to delete the artist '{item.Name}'?",
            "Yes", 
            "No", 
            "Delete Artist?");
        DialogResult result = await dialog.Result;
    
        // If cancelled, return
        if (result.Cancelled)
        {
            return;
        }
    
        // Delete the item
        try
        {
            repository.Delete(item);
            await repository.SaveAsync();
            LoadData();
        }
        catch (Exception exc)
        {
            string errorMessage = exc.InnerException?.Message ?? exc.Message;
            await dialogService.ShowErrorAsync("Error", errorMessage);
        }
    }


    Some remarks on this code: This code is executed on the server, but you don’t need to think about this because you picked the `@rendermode InteractiveServer`.

    Before I delete an artist (you always think twice before deleting the Boss), I open a dialog to ask the user if they really want to delete this brilliant artist.

    This type of confirmation dialog is a built-in feature of the Fluent library. In the next step, I’ll show you how to build your own dialogs.

    Additional remark: You should never, ever delete the Boss, by the way.

    Edit or Add Data

    If you want to add new artists to the database, you need to enter additional information like name and description. For this scenario, you may need a customized form to enter this data. Like in other frameworks, you can build a new „component“ based on other components.

    In Blazor, you create a new component and display it in a „dialog,“ „flyout panel,“ or other components.

    Here is the `EditArtistPanel.razor` that I will use later in different kinds of dialogs:

    @using ConcertDatabase.Entities
    @implements IDialogContentComponent<Artist>
    
    <FluentDialogHeader ShowDismiss="false">
        <FluentStack VerticalAlignment="VerticalAlignment.Center">
            <FluentIcon Value="@(new Icons.Regular.Size24.Delete())" />
            <FluentLabel Typo="Typography.PaneHeader">
                @Dialog.Instance.Parameters.Title
            </FluentLabel>
        </FluentStack>
    </FluentDialogHeader>
    
    <FluentTextField Label="Name" @bind-Value="@Content.Name" />
    <FluentTextField Label="Description" @bind-Value="@Content.Description" />
    
    <FluentDialogFooter>
        <FluentButton Appearance="Appearance.Accent" IconStart="@(new Icons.Regular.Size20.Save())" OnClick="@SaveAsync">Save</FluentButton>
        <FluentButton Appearance="Appearance.Neutral" OnClick="@CancelAsync">Cancel</FluentButton>
    </FluentDialogFooter>
    
    @code {
    
        [Parameter]
        public Artist Content { get; set; } = default!;
    
        [CascadingParameter]
        public FluentDialog Dialog { get; set; } = default!;
    
        private async Task SaveAsync()
        {
            await Dialog.CloseAsync(Content);
        }
    
        private async Task CancelAsync()
        {
            await Dialog.CancelAsync();
        }
    }


    This Razor component is quite simple. It implements the `IDialogContentComponent` interface, which means adding a property parameter called `Content` and the cascading parameter `Dialog`.

    The `Content` property defines the data that is passed to the component and will also be returned when the dialog is closed. The component contains a header, a footer with save and cancel buttons, and fields for the artist’s name and description.

    The code only closes the dialog and does nothing more.

    Before I show you my implementation of the call to open the dialog, I want to show you two possible ways to open an editor for the artist item.

    **Option 1:** A modal dialog that looks like a classic window

    **Option 2:** A flyout panel

    Both methods use the exact same component, but they appear differently.

    The following code shows how to call both of them:

    // Open the dialog for the item
    private async Task EditInDialog(Artist originalItem)
    {
        var parameters = new DialogParameters
            {
                Title = "Edit Artist",
                PreventDismissOnOverlayClick = true,
                PreventScroll = true
            };
    
        var dialog = await dialogService.ShowDialogAsync<EditArtistPanel>(originalItem.DeepCopy(), parameters);
        var dialogResult = await dialog.Result;
        await HandleEditConcertDialogResult(dialogResult, originalItem);
    }
    
    // Open the panel for the item
    private async Task EditInPanel(Artist originalItem)
    {
        DialogParameters<Artist> parameters = new()
            {
                Title = $"Edit Artist",
                Alignment = HorizontalAlignment.Right,
                PrimaryAction = "Ok",
                SecondaryAction = "Cancel"
            };
        var dialog = await dialogService.ShowPanelAsync<EditArtistPanel>(originalItem.DeepCopy(), parameters);
        var dialogResult = await dialog.Result;
        await HandleEditConcertDialogResult(dialogResult, originalItem);
    }
    
    // Handle the result of the edit dialog/panel
    private async Task HandleEditConcertDialogResult(DialogResult result, Artist originalItem)
    {
        // If cancelled, return
        if (result.Cancelled)
        {
            return;
        }
    
        // If the data is not null, update the item
        if (result.Data is not null)
        {
            var updatedItem = result.Data as Artist;
            if (updatedItem is null)
            {
                return;
            }
    
            // Take the data from the "edited" item and put it into the original item
            originalItem.Name = updatedItem.Name;
            originalItem.Description = updatedItem.Description;
    
            repository.Update(originalItem);
            await repository.SaveAsync();
            LoadData();
        }
    }


    The function `EditInDialog` calls the `ShowDialogAsync` method of the `dialogService`, and `EditInPanel` calls the `ShowPanelAsync` function. Both are configured with parameters for visualization.

    You may notice that I’m using a variable called `dialogService`. This was injected at the top of the component with `@inject IDialogService dialogService`. To make this work correctly, you also need to add the component `<FluentDialogProvider @rendermode=“RenderMode.InteractiveServer“ />` in the `MainLayout.razor` component or where it will be required. Otherwise, the dialogs will not show up.

    I have one more additional remark about the code here. I’m using this code statement: `originalItem.DeepCopy()`, to create a copy of an object. I’m doing this because otherwise, the dialogs would change the object instantly and not only on clicking „OK“.

    I’m doing this deep copy with a quite simple extension method:

    public static class ExtensionMethods
    {
        public static T DeepCopy<T>(this T self)
        {
            var serialized = JsonSerializer.Serialize(self);
            var result = JsonSerializer.Deserialize<T>(serialized) ?? default!;
            return result;
        }
    }
    

    This is the simplest way to clone an object, regardless of its depth and complexity. It may not be the most efficient way, but it works for me here.

    To be complete on the methods, I also want to show the add method:

    private async Task AddInDialog()
    {
        // Create new empty object
        Artist newItem = new();
    
        var parameters = new DialogParameters
            {
                Title = "Add Artist",
                PreventDismissOnOverlayClick = true,
                PreventScroll = true
            };
        // show dialog
        var dialog = await dialogService.ShowDialogAsync<EditArtistPanel>(newItem, parameters);
        var dialogResult = await dialog.Result;
        await HandleAddDialogResult(dialogResult);
    }
    
    private async Task HandleAddDialogResult(DialogResult result)
    {
        if (result.Cancelled)
        {
            return;
        }
    
        if (result.Data is not null)
        {
            var newItem = result.Data as Artist;
            if (newItem is null)
            {
                return;
            }
            await repository.AddAsync(newItem);
            await repository.SaveAsync();
            LoadData();
        }
    }
    

    And What About Concerts

    Each artist I’m tracking in my database, has concerts that I’ve visited. This is handled in the Artist Details Page.

    The implementation looks like this:

    @page "/artist/{ItemID:guid}"
    @using ConcertDatabase.Components.Pages.Artists.Panels
    @using ConcertDatabase.Components.Pages.Concerts.Panels
    @using ConcertDatabase.Entities
    @using ConcertDatabase.Repositories
    @inject IDialogService dialogService
    @inject ArtistRepository repository
    @inject NavigationManager navigationManager
    
    @rendermode InteractiveServer
    
    <h3>Artist Details</h3>
    
    @if (artist != null)
    {
        <FluentLabel>@artist.Name</FluentLabel>
        <FluentLabel>@artist.Description</FluentLabel>
    
        <FluentButton IconStart="@(new Icons.Regular.Size16.Delete())" OnClick="@(() => DeleteArtist())">Delete Artist</FluentButton>
    
        <FluentButton IconStart="@(new Icons.Regular.Size16.Add())" OnClick="@(() => AddConcert())">Add Concert</FluentButton>
    
        if (artist.Concerts != null)
        {
            <FluentDataGrid Items="@concerts" TGridItem="Concert">
                <PropertyColumn Property="@(c => c.Name)" Sortable="true" />
                <TemplateColumn Title="Date" Sortable="true">
                    <FluentLabel>@context.Date?.ToShortDateString()</FluentLabel>
                </TemplateColumn>
                <PropertyColumn Property="@(c => c.Venue)" Sortable="true" />
                <PropertyColumn Property="@(c => c.City)" Sortable="true" />
                <TemplateColumn Title="Actions">
                    <FluentButton IconStart="@(new Icons.Regular.Size16.DesktopEdit())" OnClick="@(() => EditInPanel(context))" />
                    <FluentButton IconStart="@(new Icons.Regular.Size16.Delete())" OnClick="@(() => DeleteItem(context))" />
                    <FluentButton IconStart="@(new Icons.Regular.Size16.Glasses())" OnClick="@(() => ShowConcert(context))" />
                </TemplateColumn>
            </FluentDataGrid>
        }
    }
    else
    {
        <p><em>Loading...</em></p>
    }
    
    @code {
        [Parameter]
        public Guid ItemId { get; set; }
    
        Artist? artist;
        IQueryable<Concert>? concerts;
    
        protected override async Task OnInitializedAsync()
        {
            await LoadData();
        }
    
        private async Task LoadData()
        {
            artist = await repository.GetByIdWithConcerts(ItemId);
            concerts = artist?.Concerts?.AsQueryable() ?? null;
        }
    
        #region Data Methods
    
        private async Task DeleteArtist()
        {
            if (artist is null)
            {
                return;
            }
    
            var dialogParameters = new DialogParameters
                {
                    Title = "Delete Artist",
                    PreventDismissOnOverlayClick = true,
                    PreventScroll = true
                };
    
            var dialog = await dialogService.ShowConfirmationAsync(
                "Are you sure you want to delete this artist?",
                "Yes",
                "No",
                "Delete Concert?");
            var result = await dialog.Result;
            if (!result.Cancelled)
            {
                repository.Delete(artist);
                await repository.SaveAsync();
                navigationManager.NavigateTo("/artists");
            }
        }
    
        #region Add
    
        private async Task AddConcert()
        {
            Concert newItem = new();
    
            var parameters = new DialogParameters
                {
                    Title = "Add Concert",
                    PreventDismissOnOverlayClick = true,
                    PreventScroll = true
                };
    
            var dialog = await dialogService.ShowDialogAsync<EditConcertPanel>(newItem, parameters);
            var dialogResult = await dialog.Result;
            await HandleAddDialogResult(dialogResult);
        }
    
        private async Task HandleAddDialogResult(DialogResult result)
        {
            if (result.Cancelled)
            {
                return;
            }
    
            if (result.Data is not null)
            {
                var concert = result.Data as Concert;
                if (concert is null)
                {
                    return;
                }
    
                if (artist is null)
                {
                    return;
                }
    
                repository.AddConcert(artist, concert);
                await LoadData();
            }
        }
    
        #endregion 
    
        #region Edit
    
        private async Task EditInDialog(Concert originalItem)
        {
            var parameters = new DialogParameters
                {
                    Title = "Edit Concert",
                    PreventDismissOnOverlayClick = true,
                    PreventScroll = true
                };
    
            var dialog = await dialogService.ShowDialogAsync<EditConcertPanel>(originalItem.DeepCopy(), parameters);
            var dialogResult = await dialog.Result;
            await HandleEditConcertDialogResult(dialogResult, originalItem);
        }
    
        private async Task EditInPanel(Concert originalItem)
        {
            DialogParameters<Concert> parameters = new()
                {
                    Title = $"Edit Concert",
                    Alignment = HorizontalAlignment.Right,
                    PrimaryAction = "Ok",
                    SecondaryAction = "Cancel"
                };
            var dialog = await dialogService.ShowPanelAsync<EditConcertPanel>(originalItem.DeepCopy(), parameters);
            var dialogResult = await dialog.Result;
            await HandleEditConcertDialogResult(dialogResult, originalItem);
        }
    
        private async Task HandleEditConcertDialogResult(DialogResult result, Concert originalItem)
        {
            if (result.Cancelled)
            {
                return;
            }
    
            if (result.Data is not null)
            {
                var concert = result.Data as Concert;
                if (concert is null)
                {
                    return;
                }
    
                originalItem.Name = concert.Name;
                originalItem.Description = concert.Description;
                originalItem.Date = concert.Date;
                originalItem.Venue = concert.Venue;
                originalItem.City = concert.City;
                originalItem.SetList = concert.SetList;
                originalItem.Url = concert.Url;
    
                repository.UpdateConcert(originalItem);
                await repository.SaveAsync();
                await LoadData();
            }
        }
    
        #endregion
    
        #region Delete
        
        private async Task DeleteItem(Concert item)
        {
            if (item is null)
            {
                return;
            }
    
            var dialogParameters = new DialogParameters
            {
                Title = "Delete Concert",
                PreventDismissOnOverlayClick = true,
                PreventScroll = true
            };
    
            var dialog = await dialogService.ShowConfirmationAsync(
                "Are you sure you want to delete this concert?", 
                "Yes", 
                "No", 
                "Delete Concert?");
            var result = await dialog.Result;
            if (!result.Cancelled)
            {
                repository.DeleteConcert(item);
                await repository.SaveAsync();
                await LoadData();
            }
        }
    
        #endregion
    
        private void ShowConcert(Concert item)
        {
            navigationManager.NavigateTo($"/concert/{item.ID}");
        }
    
        #endregion
    }
    

    More Information

    This article documents some (but not all) interesting features and my learnings with Blazor and the Fluent UI. It only took a few hours to set this up. In one of my next posts, I will describe the data infrastructure behind this solution in depth.

    🤟 Stay tuned and rock on.

    You can find my latest code for the concert database here: https://github.com/oliverscheer/blazor-fluent-ui-demo

  • Start with ASP.NET Core, Blazor and Fluent UI

    Start with ASP.NET Core, Blazor and Fluent UI

    I’ve been away from real UI projects for a while, because of focusing on Azure backend things in the last projects. But recently, I needed to create some simple UIs for several projects to pump data into databases. While almost everyone at Medialesson loves Angular, I wanted to explore something different and revisit my roots. That’s why I chose Blazor as my „new“ UI framework of the month. I was surprised at how easy it is to get started with it.

    Another important fact about developer is, they are developers and not designers. That is also true for me. Years ago, I realized that I’m not particularly talented at building nice UIs, so I wanted to keep the design simple and use existing controls and themes. I searched a while and I’m happy that I discovered that Fluent is quite easy to use for decent design, and it brings a lot of good UI controls, like my favorite data grid.

    In this post, I want to lay out the base for my upcoming posts about how to build data-driven apps with Blazor and Fluent.

    Agenda

    – Why I Like Blazor and Fluent?
    – What is Blazor?
    – What is Fluent 2?
    – The First Application

    Why I Like Blazor and Fluent

    My top (incomplete and still growing) highlights in Blazor are:
    – Pure C#, with no real need for JavaScript/TypeScript, though it’s possible to use them.
    – Real components that can be structured in libraries for reuse.
    – Reuse of almost any other C#/.NET features, like Entity Framework and Dependency Injection.
    – Older code still works seamlessly.
    – Controls, controls, and even more controls.

    But before I begin coding in the next posts, I want to highlight some essentials about Blazor and the Fluent design.

    What is Blazor?

    Blazor is a …
    Web Framework: Blazor is a web framework developed by Microsoft that allows developers to build interactive web applications using C# instead of JavaScript.

    And it brings …
    .NET Integration: It is part of the ASP.NET Core framework, enabling full-stack web development with .NET, sharing code between server and client.
    Web Assembly Support: Blazor Web Assembly (WASM) runs client-side in the browser via Web Assembly, allowing for near-native performance and offline capabilities.
    Component-Based Architecture: Blazor uses a component-based architecture, where UI components are built as reusable pieces of code that can include markup and logic.
    SignalR Integration: Blazor Server uses SignalR for real-time web functionality, maintaining a constant connection between the client and server to handle user interactions and UI updates.

    More information about Blazor: https://blazor.net/

    What is Fluent 2?

    Fluent is a …
    Design System: Microsoft Fluent 2 is a design system that provides a comprehensive set of design guidelines, components, and tools to create cohesive, accessible, and high-quality user interfaces.

    And it brings …
    Cross-Platform: Fluent 2 is designed to work across multiple platforms, including web, mobile, and desktop, ensuring a consistent user experience across different devices and applications.
    Modern Aesthetics: It focuses on modern design principles such as simplicity, clarity, and efficiency, with an emphasis on clean lines, intuitive layouts, and vibrant yet harmonious color schemes.
    Accessibility: Fluent 2 prioritizes accessibility, providing guidelines and components that help developers create inclusive applications that are usable by people with various disabilities.
    Customization and Flexibility: The system is highly customizable, allowing developers to tailor the design components to match their brand identity while maintaining a coherent overall look and feel.

    More information about Fluent 2: https://blazor.net/

    Getting Started

    I work with the latest version of the .NET Core SDK: https://dotnet.microsoft.com/en-us/download.

    I always use a mix of [Visual Studio](https://visualstudio.microsoft.com/en/downloads/) and [Visual Studio Code](https://code.visualstudio.com/) for editing code. Visual Studio Code is more straightforward and shows all files, while Visual Studio has a richer editing UI but hides some of the dirty secrets.

    I assume you have the Web Development package installed when using Visual Studio.

    The Fluent UI features are not part of the default installation of Visual Studio or the .NET SDKs. They are maintained separately on GitHub: https://github.com/microsoft/fluentui-blazor. Fortunately, there are project templates for `dotnet`, which can be used with the dotnet CLI and/or Visual Studio.

    You can also manually add them to existing projects with the package manager.

    dotnet add package Microsoft.Fast.Components.FluentUI
    

    But honestly, you need to add some more files, links, etc., to your project. The complete documentation on how to add Fluent to an existing Blazor app can be found here.

    For now, I prefer to start fresh on a greenfield project.

    To check if you have the project templates already installed:

    # list installed templates
    dotnet new list
    

    If you can’t find them in the list, install them from the cli with:

    # install blazor fluent templates
    dotnet new install Microsoft.FluentUI.AspNetCore.Templates
    

    Create Your First Blazor Fluent App

    Create a new project with `dotnet` cli and start it with:

    dotnet new fluentblazor -n ConcertDatabase
    cd ConcertDatabase
    dotnet run
    

    Create a new project in Visual Studio:

    Hit F5 in Visual Studio or click the web-link in the cli and you will see the beautiful sample web app

    UI Controls

    When you are interest in what kind of controls come with Fluent for Blazor, take a look at: https://www.fluentui-blazor.net/. That’s where I got my inspirations and sample codes from

    I hope you like the easiness of Blazor like I do.

  • How I Taught ChatGPT to Read the Clock: Introducing Semantic Kernel

    How I Taught ChatGPT to Read the Clock: Introducing Semantic Kernel

    This article is a guide to developing your first semantic kernel app using dotnet and C#, enabling you to add dynamic features to your AI solution.

    Challenge and Problem Statement

    A common limitation of AI models is their static nature. For instance, when asked “Is the queen still alive?” ChatGPT might respond affirmatively based on outdated information. Such models struggle with dynamically changing information and complex calculations not readily available in public documents.

    What Time Is It?

    Ever wondered why ChatGPT can’t provide the current date and time? As a text-generating engine, it relies on predictions from existing data. Attempting to ask for the current date, time, or day of the week yields no response.

    Below is the initial version of my sample application with no additional plugins.

    To enhance your AI solution’s intelligence, you can leverage the plugin feature of the open-source Semantic Kernel SDK. This enables you to write your own “features” for a large language model.

    Requirements

    To create your first semantic kernel plugin, I recommend using the latest version of dotnet and Visual Studio Code.

    Additionally, you’ll need to install the Semantic Kernel SDK in your project with: dotnet add package Microsoft.SemanticKernel.

    You’ll also need an existing Azure OpenAI Service in your Azure Tenant.

    Code

    The demo application is a basic console chat application offering only rudimentary mathematical and datetime calculation functions.

    Configuration

    Create a configuration file named appsetting.json, and include your model’s name, endpoint, and key in the json.

    {
      "OpenAIEndpoint": "",
      "OpenAPIKey": "",
      "ModelName": ""
    }
    

    Plugin Code

    To write a plugin it is only required to add attributes to methods and parameters. Those attributes indicate the methods with intentions to return data.

    Create a new file with the name DateTimePlugin.cs.

    using Microsoft.SemanticKernel;
    using System.ComponentModel;
    
    namespace Oliver.AI.Samples.ChatGPTPlugin.Plugins
    {
        public sealed class DateTimePlugin
        {
            [KernelFunction, Description("What date is today?")]
            public static DateTime GetDate()
            {
                return DateTime.Today;
            }
    
            [KernelFunction, Description("What day of week is today?")]
            public static DayOfWeek GetDay()
            {
                return DateTime.Today.DayOfWeek;
            }
    
            [KernelFunction, Description("What time is it?")]
            public static DateTime GetTime()
            {
                return DateTime.Now;
            }
        }
    }
    

    The Console Application Code

    The magic to add the plugin to the existing ChatCompletionService is just s single line of code:

    builder.Plugins.AddFromType&lt;DateTimePlugin>();
    

    The complete code with the file name Program.cs.

    using Microsoft.Extensions.Configuration;
    using Microsoft.SemanticKernel;
    using Microsoft.SemanticKernel.ChatCompletion;
    using Microsoft.SemanticKernel.Connectors.OpenAI;
    using Oliver.AI.Samples.ChatGPTPlugin.Plugins;
    
    #region Configuration
    
    // Read the condiguration from an appsettings.json file
    // to avoid exploiting the API key and endpoint in a demo
    
    var configuration = new ConfigurationBuilder()
        .SetBasePath(Directory.GetCurrentDirectory())
        .AddJsonFile("appsettings.json", true)
        .AddJsonFile("appsettings.Development.json", true)
        .Build();
    
    string endpoint = configuration["OpenAIEndpoint"] ?? "";
    string modelName = configuration["ModelName"] ?? "";
    string apiKey = configuration["OpenAPIKey"] ?? "";
    
    #endregion 
    
    // Create kernel
    IKernelBuilder builder = Kernel.CreateBuilder();
    
    // Add a text or chat completion service using either:
    builder.Services.AddAzureOpenAIChatCompletion(modelName, endpoint, apiKey);
    builder.Plugins.AddFromType&lt;MathPlugin>();
    builder.Plugins.AddFromType&lt;DateTimePlugin>();
    
    Kernel kernel = builder.Build();
    
    // Create chat history
    ChatHistory history = [];
    
    // Get chat completion service
    var chatCompletionService = kernel.GetRequiredService&lt;IChatCompletionService>();
    
    Console.WriteLine("Olivers ChatGPT Plugins");
    Console.WriteLine("-----------------------");
    Console.WriteLine("Type 'exit' to quit the conversation");
    Console.WriteLine();
    
    // Start the conversation
    while (true)
    {
        // Get user input
        Console.Write("User > ");
        string userInput = Console.ReadLine()!;
        if (userInput.ToLower() == "exit")
        {
            break;
        }
        history.AddUserMessage(userInput);
    
        // Enable auto function calling
        OpenAIPromptExecutionSettings openAIPromptExecutionSettings = new()
        {
            ToolCallBehavior = ToolCallBehavior.AutoInvokeKernelFunctions
        };
    
        // Get the response from the AI
        var result = chatCompletionService.GetStreamingChatMessageContentsAsync(
            history,
            executionSettings: openAIPromptExecutionSettings,
            kernel: kernel);
    
        // Stream the results
        string fullMessage = "";
        var first = true;
        await foreach (var content in result.ConfigureAwait(false))
        {
            if (content.Role.HasValue &amp;&amp; first)
            {
                Console.Write("Assistant > ");
                first = false;
            }
            Console.Write(content.Content);
            fullMessage += content.Content;
        }
        Console.WriteLine();
        Console.WriteLine();
    
        // Add the message from the agent to the chat history
        history.AddAssistantMessage(fullMessage);
    }
    
    Console.WriteLine("Goodbye!");


    Running the Application

    Run the application and ask some of the following questions:

    • Which day is today?
    • What time is it?
    • Which day of the week is today?
    • Welcher Wochentag ist heute?

    Video

    I’ve recorded a short video demonstrating this process, which I’ve posted on YouTube.

    English Version | German Version

    Conclusion

    With the Semantic Kernel, you can create scenarios beyond simple questions. You can retrieve data from internal sources, engage in more intensive dialogs, and much more. Stay tuned for further developments.

    You can find more information here.

  • Checking App Settings at Startup

    Checking App Settings at Startup

    This article provides a comprehensive sample demonstrating how to effectively utilize app settings in ASP.NET Core applications.

    Problem Statement

    In the realm of application development, managing settings efficiently can be a pivotal but often overlooked aspect, especially when collaborating with team members. Imagine a scenario where you or your colleagues add or remove settings during development, such as passwords, connection strings, or keys. These sensitive pieces of information should never find their way into your source code control system.

    However, a common occurrence is that someone adds a new setting essential for a feature without communicating it to other team members. Consequently, you might encounter unexpected exceptions or peculiar behavior within your application, leading to time-consuming investigations.

    Consider this familiar code snippet:

    string openAIKey = Environment.GetEnvironmentVariable("OpenAIKey");
    

    This pattern, while prevalent, is both frustrating and risky when employed within teams.

    ## Solution

    To mitigate such issues effectively, I strongly advocate for implementing the following practices:

    1. Define Settings in a Dedicated Class

    using System.ComponentModel.DataAnnotations;
    
    namespace Oliver.Tools.Copilots
    {
        public class OpenAISettings
        {
            public const string Key = "OpenAISettings";
    
            [Required(ErrorMessage = "OpenAIKey required")]
            public required string OpenAIKey { get; set; }
    
            [Required(ErrorMessage = "OpenAIEndpoint required")]
            public required string OpenAIEndpoint { get; set; }
        }
    }
    

    2. Configure Settings at Startup in Program.cs

    IServiceCollection services = builder.Services;
    
    IConfigurationSection? openAISettings = builder.Configuration.GetSection(OpenAISettings.Key);
    services
        .Configure<OpenAISettings>(openAISettings)
        .AddOptionsWithValidateOnStart<OpenAISettings>()
        .ValidateDataAnnotations();
    

    3. Run the application

    Encountering an exception at the application’s start is both beneficial and intentional.

    The sooner the better an exception is thrown, the earlier you can fix a problem. It is getting harder when you need to search late in the development process for a missing setting, somewhere hidden in the some code.

    4. Include Settings in your local appsettings.json File

    {
      "Logging": {
        "LogLevel": {
          "Default": "Information",
          "Microsoft.AspNetCore": "Warning"
        }
      },
      "OpenAISettings": {
        "OpenAIKey": "1234567890987654321",
        "OpenAIEndpoint": "https://youropenaiendpoint.openai.azure.com/"
      }
    }
    

    Even though settings are not case-sensitive by default, any minor typos will result in exceptions.

    5. Additional Perk: Dependency Injection

    This pattern facilitates effortless dependency injection, allowing settings to be readily injected into other classes.

    namespace DataWebApp.Controllers
    {
        [ApiController]
        [Route("[controller]")]
        public class ChatController : ControllerBase
        {
            private readonly OpenAISettings _mySettings;
    
            public ChatController(IOptions&lt;OpenAISettings> mySettings)
            {
                _mySettings = mySettings.Value;
            }
    
            ...        
        }
    }
    

    In Conclusion

    Adopting this recommended approach not only streamlines your development process but also saves invaluable time that would otherwise be spent scouring through codebases in search of elusive settings.

  • Embed Sample Data in Your Code

    Embed Sample Data in Your Code

    One of my favorite tricks for data-driven apps is to include sample data during development. This sample data is invaluable for various purposes such as designing UIs, conducting demos, or running tests.

    For this reason, I recommend integrating test data into the solution for debug releases. While not suitable for release builds, it proves highly beneficial during debug mode.

    ### Getting Started

    First, obtain a sample dataset. For instance, you can use the Titanic dataset available [here](https://github.com/datasciencedojo/datasets/blob/master/titanic.csv).

    Next, add the CSV file to your file structure. Your Solution Explorer should resemble the following:

    Particularly important, don’t forget to change the property `Build Action` to `Embedded resource`. Otherwise, this is not working.

    ### Code

    Create a class to represent `TitanicPassengers`:

    using System.ComponentModel.DataAnnotations;
    
    namespace Common.Models;
    
    public class TitanicPassenger
    {
        [Key]
        public int PassengerId { get; set; }
        public bool Survived { get; set; }
        public int Pclass { get; set; }
        [Required]
        public string Sex { get; set; }
        public float Age { get; set; }
        [Required]
        public string Name { get; set; }
        public int SibSp { get; set; }
        public int Parch { get; set; }
        [Required]
        public string Ticket { get; set; }
        public float Fare { get; set; }
        [Required]
        public string Cabin { get; set; }
        public char Embarked { get; set; }
    }
    

    Use the following code to read data from the embedded file:

    using Common;
    using Common.Models;
    using System.Reflection;
    
    namespace DataWebApp.Models;
    
    public class TitanicPassengersSeed
    {
        // Load CSV file into a List of TitanicPassenger   
        public static List<TitanicPassenger> LoadPassengers()
        {
            // Get the file from embedded resources
            Assembly assembly = Assembly.GetExecutingAssembly();
            string resourceName = "Common.SampleData.TitanicPassengers.csv";
            Stream? stream = assembly.GetManifestResourceStream(resourceName);
            if (stream == null)
            {
                throw new Exception("Cannot find TitanicPassengers.csv");
            }
            StreamReader reader = new StreamReader(stream);
            string[] lines = reader.ReadToEnd().Split('\n');
            List<TitanicPassenger> passengers = new();
    
            // Read file and create TitanicPassenger objects
            foreach (var line in lines.Skip(1))
            {
                // The Names of the passengers have commas
                // so we need to replace ", " with "__ " to avoid splitting the name
                string lineHelper = line.Replace(", ", "__ ");
                string[] columns = lineHelper.Split(',');
                TitanicPassenger passenger = new()
                {
                    Survived = columns[1] == "1",
                    Pclass = int.Parse(columns[2]),
                    Name = columns[3].Replace("__ ", ", ").Replace("\"", ""),
                    Sex = columns[4],
                    Age = float.Parse(string.IsNullOrEmpty(columns[5]) ? "0" : columns[5]),
                    SibSp = int.Parse(string.IsNullOrEmpty(columns[6]) ? "0" : columns[6]),
                    Parch = int.Parse(string.IsNullOrEmpty(columns[7]) ? "0" : columns[7]),
                    Ticket = columns[8],
                    Fare = float.Parse(string.IsNullOrEmpty(columns[9]) ? "0" : columns[9]),
                    Cabin = columns[10],
                    Embarked = columns[11][0]
                };
                passengers.Add(passenger);
            }
            return passengers;
        }
    
        // Seed the database with the List of TitanicPassenger
        public static void SeedPassengers(MyCopilotDbContext context)
        {
            if (context.TitanicPassengers.Any())
            {
                return;   // DB has been seeded
            }
            List<TitanicPassenger> passengers = LoadPassengers();
            context.TitanicPassengers.AddRange(passengers);
            context.SaveChanges();
        }
    }

    ### Conclusion

    With this approach, you can easily load seed data into your database for testing purposes.

    Happy coding!

  • Auto Cleanup Azure Blob Storage

    This article gives you a snippet to clean up your blob storage frequent, to keep only a specific time of data.

    Azure Blob Storage offers a brilliant and straightforward solution for storing vast amounts of data. However, when it’s unnecessary to retain all data indefinitely, such as data only needed for a few days, it becomes essential to periodically clean up the storage. This ensures optimal resource management and cost-effectiveness within your Azure environment.

    using Microsoft.Azure.Functions.Worker;
    using Microsoft.Extensions.Logging;
    
    namespace OliverSamples
    {
        public class CleanupFunction(ILoggerFactory loggerFactory)
        {
            private readonly ILoggerFactory _loggerFactory = loggerFactory;
            private readonly ILogger _logger = loggerFactory.CreateLogger<CleanupFunction>();
    
            [Function("StorageCleanup")]
            public async Task Run([TimerTrigger("0 */2 * * * *")] TimerInfo myTimer)
            {
                _logger.LogInformation($"C# Timer trigger function executed at: {DateTime.Now}");
    
                StorageService storageService = new(_loggerFactory);
                await storageService.DeleteOldData();
    
                if (myTimer.ScheduleStatus is not null)
                {
                    _logger.LogInformation($"Next timer schedule at: {myTimer.ScheduleStatus.Next}");
                }
            }
        }
    }

    The logic for cleaning up the storage resides within a small service helper that I’ve personally developed.

    using Azure.Storage.Blobs;
    using Azure.Storage.Blobs.Models;
    using Microsoft.Extensions.Logging;
    using Microsoft.WindowsAzure.Storage;
    using Microsoft.WindowsAzure.Storage.Blob;
    using System.Text.Json;
    
    public class OliverSamples
    {
        private readonly string _blogStorageConnectionString;
        private readonly ILogger<StorageService> _logger;
        private CloudStorageAccount? _storageAccount;
        private CloudBlobClient? _blobClient;
        private int _maxHoursToKeep = 24;
    
        public StorageService(ILoggerFactory loggerFactory)
        {
            _logger = loggerFactory.CreateLogger<StorageService>();
    
            string blogStorageConnectionString = Environment.GetEnvironmentVariable(Const.AppSettings.STORAGE_ACCOUNT_CONNECTION_STRING) ?? "";
            if (string.IsNullOrEmpty(blogStorageConnectionString))
            {
                throw new Exception($"Configuration '{Const.AppSettings.STORAGE_ACCOUNT_CONNECTION_STRING}' is not set.");
            }
            _blogStorageConnectionString = blogStorageConnectionString;
        }
    
        private CloudBlobClient GetBlobClient()
        {
            if (_blobClient != null)
            {
                return _blobClient;
            }
            _storageAccount ??= CloudStorageAccount.Parse(_blogStorageConnectionString);
            _blobClient = _storageAccount.CreateCloudBlobClient();
            return _blobClient;
        }
    
        public async Task DeleteOldData()
        {
            List<string> containerToClean =
            [
                "MyContainer1", 
                "MyContainer2", 
                "MyContainer3"
            ];
    
            foreach(var container in containerToClean)
            {
                await CleanContainer(container);
            }
        }
    
        private async Task CleanContainer(string containerName)
        {
            CloudBlobClient blobClient = GetBlobClient();
            CloudBlobContainer container = blobClient.GetContainerReference(containerName);
            BlobContinuationToken continuationToken = null;
            do
            {
                var resultSegment = await container.ListBlobsSegmentedAsync(null, true, BlobListingDetails.Metadata, null, continuationToken, null, null);
                continuationToken = resultSegment.ContinuationToken;
                foreach (IListBlobItem item in resultSegment.Results)
                {
                    if (item is CloudBlockBlob blockBlob)
                    {
                        DateTimeOffset? created = blockBlob.Properties.Created;
                        if (created.HasValue && DateTimeOffset.UtcNow.Subtract(created.Value).TotalHours > _maxHoursToKeep)
                        {
                            await blockBlob.DeleteAsync();
                        }
                    }
                }
            } while (continuationToken != null);
        }
    
    }

    Conclusion

    With this Azure Function you clean containers in your blob storage ever 5 minutes. Files that are older than 24 hours, will be removed.

  • Authorize User in Azure Functions in Isolated Mode

    Alright, fellow cloud adventurers, let’s talk about Azure Functions and the wild ride that is .NET 8 Isolated Mode. You see, when it comes to authorizing functions for specific user groups, many of us rely on the trusty Authorize-Attribute. It’s been our go-to for granting access to authenticated user groups with ease.

    But hold onto your hats, because things take an unexpected turn when you try to wield this power in Azure Functions .NET 8 Isolated Mode. Suddenly, that trusty old Authorize-Attribute seems to have lost its mojo.

    What gives, you ask? Well, it seems the way our functions check request headers isn’t quite the same as it used to be. But fear not, intrepid developers! With a dash of brainstorming and a sprinkle of ingenuity, I stumbled upon a solution.

    Enter: the DIY token checker. That’s right, folks. When the going gets tough, the tough get coding. I rolled up my sleeves and crafted a nifty little helper to handle token checks for specific user groups.

    Because in the ever-evolving world of Azure Functions and .NET 8 Isolated Mode, sometimes you’ve got to take matters into your own hands. So here’s to blazing new trails, overcoming unexpected challenges, and always finding a way to make our functions work for us – no matter what mode they’re in.

    using Microsoft.Azure.Functions.Worker.Http;
    using System.Security.Claims;
    using System.Security.Principal;
    
    namespace OliverS.Helper
    {
        public static class ClaimsHelper
        {
            public static bool CheckPrincipalHasClaim(HttpRequestData req, string claimType, string claimValue)
            {
                ClaimsPrincipal? principal = ClaimsPrincipalHelper.ParseFromRequest(req);
    
                if (principal == null)
                {
                    return false;
                }
    
                if (principal.HasClaim(claimType, claimValue))
                {
                    return true;
                }
                return false;
            }
    
            public static bool ClaimExists(this IPrincipal principal, string claimType)
            {
                if (principal is not ClaimsPrincipal ci)
                {
                    return false;
                }
    
                Claim? claim = ci.Claims.FirstOrDefault(x => x.Type == claimType);
                return claim != null;
            }
    
            public static bool HasClaim(
                this IPrincipal principal, 
                string claimType,
                string claimValue, 
                string issuer = null)
            {
                if (principal is not ClaimsPrincipal ci)
                {
                    return false;
                }
    
                var claim = ci
                    .Claims
                    .FirstOrDefault(x => x.Type == claimType && x.Value == claimValue && (issuer == null || x.Issuer == issuer));
                return claim != null;
            }
    
            public static string GetUserEmail(HttpRequestData req)
            {
                ClaimsPrincipal? principal = ClaimsPrincipalHelper.ParseFromRequest(req);
                if (principal == null)
                {
                    return string.Empty;
                }
                string result = principal.FindFirst("unique_name")?.Value ?? string.Empty;
                return result;
            }
    
            public static string GetUserName(HttpRequestData req)
            {
                ClaimsPrincipal? principal = ClaimsPrincipalHelper.ParseFromRequest(req);
                if (principal == null)
                {
                    return string.Empty;
                }
                string result = principal.Identity?.Name ?? string.Empty;
                return result;
            }
        }
    }
    

    Now, picture this: a trusty claims helper swoops in to save the day! With this nifty tool, we can determine whether a user possesses a specific claim they’re eager to access.

    It’s like having a guardian angel for our authentication process, ensuring that only those with the right credentials can venture forth into the realm of our Azure Functions. So whether it’s a VIP pass to a restricted area or a golden ticket to exclusive features, our claims helper is here to grant access to those who truly deserve it.

    [Function("mysamplefunction")]
    public async Task<HttpResponseData> GetMyData(
        [HttpTrigger(AuthorizationLevel.Anonymous, "get", Route = "mydata")] HttpRequestData req)
    {
        #region Is User Admin
    
        if (!ClaimsHelper.CheckPrincipalHasClaim(req, Const.RoleConst.RolesClaim, Const.RoleConst.Admin))
        {
            var unauthorizedResponse = new CustomResponse()
            {
                StatusCode = HttpStatusCode.Unauthorized,
                Message = "Unauthorized."
            };
            return unauthorizedResponse.CreateResponse(req);
        }
    
        #endregion
    
        
        HttpResponseData response = new CustomResponse()
        {
            StatusCode = HttpStatusCode.OK,
            Message = "Rolls found",
            Result = rolls
        }.CreateResponse(req);
    
        return response;
    }

    In this sample I’m using a helper class to have an easier work with HttpResponse.

    using Microsoft.Azure.Functions.Worker.Http;
    using System.Net;
    using System.Text.Json;
    using System.Text.Json.Serialization;
    
    namespace Haehl.IoTRoll.Models.Response
    {
        public class CustomResponse
        {
            [JsonIgnore]
            public HttpStatusCode StatusCode { get; set; }
    
            public string Message { get; set; } = string.Empty;
    
            [JsonIgnore(Condition = JsonIgnoreCondition.WhenWritingNull)]
            public string[]? ErrorMessages { get; set; } = null;
    
            [JsonIgnore(Condition = JsonIgnoreCondition.WhenWritingNull)]
            public object Result { get; set; } = default!;
    
            public HttpResponseData CreateResponse(HttpRequestData req)
            {
                HttpResponseData response = req.CreateResponse(StatusCode);
                response.Headers.Add("Content-Type", "application/json; charset=utf-8");
    
                try
                {
                    var json = JsonSerializer.Serialize(this);
                    response.WriteStringAsync(json);
                    return response;
                } 
                catch (Exception exc)
                {
                    response.WriteString(exc.Message);
                    return response;
                }
                
            }
        }
    }

    Conclusion

    Check the claim of an user is simple, but not automatically available in .net core 8 isolated mode for some reasons.

  • Enable and Disable Authentication With PowerShell

    In a recent project, a unique challenge emerged: the need to temporarily remove authentication from an Azure Function for testing purposes, only to later reinstate it. Surprisingly, finding a straightforward solution proved elusive. Despite extensive exploration, including searching for a Bicep solution or relevant APIs, I encountered obstacles. While some methods disabled authentication, artifacts persisted, preventing a clean removal.

    However, amidst this quest for a solution, a breakthrough emerged: the Azure REST API, accessible via Azure CLI, revealed itself as the ultimate tool. Leveraging this powerful API, I devised a pair of PowerShell functions capable of seamlessly managing authentication providers within Azure Functions.

    But why is this significant? Consider scenarios where developers need to streamline testing processes or troubleshoot authentication-related issues within Azure Functions. By understanding and harnessing the Azure REST API, developers gain unprecedented control and flexibility, empowering them to tailor authentication settings with precision and efficiency.

    Let’s delve into the mechanics behind this solution. The PowerShell functions below exemplify the simplicity and effectiveness of utilizing the Azure REST API to delete and subsequently re-add authentication providers within Azure Functions:

    Enable Authentication

    param (
      [Parameter(Mandatory=$true)]
      [string]$functionAppName,
    
      [Parameter(Mandatory=$true)]
      [string]$resourceGroupName,
    
      [Parameter(Mandatory=$true)]
      [string]$issuer,
    
      [Parameter(Mandatory=$true)]
      [string]$clientId,
    
      [Parameter(Mandatory=$true)]
      [string]$subscriptionId
    )
    
    $identityProvider = "AzureActiveDirectory"
    $resourceProviderName = "Microsoft.Web"
    $resourceType = "sites"
    
    $name = $functionAppName + "/config/authsettingsV2"
    
    Write-Host "Enable Authentication"
    Write-Host "Resource Group Name               : $resourceGroupName"
    Write-Host "Function App Name                 : $functionAppName"
    Write-Host "Identity Provider                 : $identityProvider"
    Write-Host "Issuer                            : $issuer"
    Write-Host "Client Id                         : $clientId"
    Write-Host "Resource Provider Name            : $resourceProviderName"
    Write-Host "Resource Type                     : $resourceType"
    Write-Host "Name                              : $name"
    
    $resourceType = "sites"
    $uri = "/subscriptions/" + $subscriptionId + "/resourceGroups/" + $resourceGroupName + "/providers/Microsoft.Web/" + $resourceType + "/" + $name + "?api-version=2021-03-01"
    Write-Host "Uri: $uri"
    
    $body = "{ 'properties': { 'globalValidation': { 'requireAuthentication': 'true', 'unauthenticatedClientAction': 'Return401' }, 'identityProviders': { 'azureActiveDirectory': { 'enabled': 'true', 'registration': { 'openIdIssuer': '$issuer', 'clientId': '$clientId', 'clientSecretSettingName': 'MICROSOFT_PROVIDER_AUTHENTICATION_SECRET' } } } } }"
    az rest --method Put --uri $uri --verbose --body $body


    Disable Authentication

    param (
      [Parameter(Mandatory=$true)]
      [string]$functionAppName,
    
      [Parameter(Mandatory=$true)]
      [string]$resourceGroupName,
    
      [Parameter(Mandatory=$true)]
      [string]$subscriptionId
    )
    
    $identityProvider = "AzureActiveDirectory"
    $resourceProviderName = "Microsoft.Web"
    $resourceType = "sites"
    
    Write-Host "Enable Authentication"
    Write-Host "Resource Group Name               : $resourceGroupName"
    Write-Host "Function App Name                 : $functionAppName"
    Write-Host "Identity Provider                 : $identityProvider"
    Write-Host "Resource Provider Name            : $resourceProviderName"
    Write-Host "Resource Type                     : $resourceType"
    Write-Host "Name                              : $name"
    
    $resourceType = "sites"
    $name = $functionAppName + "/config/authsettingsV2"
    $uri = "/subscriptions/" + $subscriptionId + "/resourceGroups/" + $resourceGroupName + "/providers/Microsoft.Web/" + $resourceType + "/" + $name + "?api-version=2021-03-01"
    Write-Host "Uri: $uri"
    
    $body = "{ 'globalValidation': { 'requireAuthentication': 'false', 'unauthenticatedClientAction': 'AllowAnonymous' }, 'httpSettings': { 'forwardProxy': { 'convention': 'NoProxy' }, 'requireHttps': 'true', 'routes': { 'apiPrefix': '/.auth' } }, 'identityProviders': { 'azureActiveDirectory': { 'enabled': 'true', 'login': { 'disableWWWAuthenticate': 'false' }, 'registration': {}, 'validation': { 'defaultAuthorizationPolicy': { 'allowedPrincipals': {} }, 'jwtClaimChecks': {} } } } }"
    
    az rest --method Put --uri $uri --verbose --body $body
    

    ## Conclusion

    These two methods delete an Authentication on an Azure Function and re-add them with the help of the Azure CLI and PowerShell.

  • Enhance Your .NET Console Applications with Spectre.Console

    Console applications in .NET often lack visual appeal and interactivity. However, Spectre.Console emerges as my personal  game-changer, revolutionizing the way developers craft command-line interfaces (CLIs). Offering a rich set of features, Spectre.Console elevates user experience and developer productivity.

    With Spectre.Console, developers can effortlessly create stylish and dynamic text-based UIs. Its intuitive API enables easy customization of colors, styles, and layouts, breathing life into mundane console applications. From progress bars to tables, and interactive prompts to ASCII art, Spectre.Console empowers developers to build immersive command-line experiences with minimal effort.

    Say goodbye to boring console applications and embrace the power of Spectre.Console for vibrant, engaging CLI development.

    Documentation: https://spectreconsole.net/

    Source: [GitHub](https://github.com/spectreconsole/spectre.console)

  • Using User Defined Functions in Azure Stream Analytics Job

    The Challenge

    Azure Stream Analytics exclusively supports functions written in .NET Standard 2.0. Handling JSON data often necessitates the utilization of tools such as Newtonsoft or features from System.Text.Json, both of which are NOT accessible in .NET Standard 2.0. Furthermore, another compelling reason to opt out for .NET is the complexity involved in storing and updating the compiled package to a designated path in Azure Blob Storage, followed by referencing it within the job configuration.

    Loosing the comfort of C# and .net and switching to JavaScript wasn’t as hard as it seems to be in the beginning. The biggest challenge was to parse the incoming JSON correctly. Uppercase and lowercase characters can ruin your day.

    ## JavaScript Calculations

    The subsequent function provided is greatly simplified, merely adding two values to produce a new result. However, it’s important to note that you can perform highly intricate calculations as well.

    function main(incomingData) {
        try {
            var result = calculateValues(incomingData);
            return result;
        }
        catch (err) {
            var result = {
                'newCalculatedValue': 0.0
            }
            return result;
        }
    };
    
    function calculateValues(incomingData) {
        var newCalculatedValue = incomingData.value1 + incomingData.value2;
        var result = {
            'newCalculatedValue': newCalculatedValue
        }
        return result;
    }

    I’ve implemented a catch block as a precautionary measure in case any „incorrect“ values are received and cannot be converted accurately. Depending on the job’s settings, an uncaught exception could result in halting the job.

    ## Calling the JavaScript Functions in the Stream Analytics Job Query

    The query provided for the job is simplified to illustrate its usage.

    WITH iothubstream AS
    (
        SELECT
            EventEnqueuedUtcTime,
            EventProcessedUtcTime,
            [IoTHub].ConnectionDeviceId AS ConnectionDeviceId,
            *
        FROM
            inputiothub TIMESTAMP BY EventEnqueuedUtcTime
    )
    , calculateddata AS
    (
        SELECT
            UDF.Calc(joineddata) as calculated,
            *
        FROM
            iothubstream
    )
    , preparedView AS
    (
        SELECT
            calculated.newCalculatedValue as newCalculatedValue,
            *
        FROM calculateddata
    )
    
    SELECT *
    INTO
         outputblobstorage
    FROM
         reducedview

    ## Conclusion

    Creating custom values within a stream job using User-Defined Functions is straightforward in JavaScript. However, it’s not advisable to do so in the CLR (Common Language Runtime) way, as it only supports .NET Standard 2.0.

    More Information

  • Updating a running Azure Stream Analytics Job

    The Problem

    Stream Analytics Jobs are a powerful means of analyzing and distributing incoming data to various target storages or services in Azure and other locations. You can only update the definition of the job, when it is stopped. However, initiating and halting Stream Analytics Jobs can be time-consuming, often requiring several minutes depending on the query’s complexity and the input/output sources.

    When it comes to updating the query within an automated process like CI/CD pipelines, waiting for the job to stop, updating it, and then restarting the service can present a significant challenge.

    In a recent project, I devised several PowerShell routines to streamline this task.

    Step 1: Stoping a Stream Analytics Job
    Step 2: Updating the job
    Step 3: Restart the job

    Stopping a Stream Analytics Job

    The code to stop the job in PowerShell

    [CmdletBinding()]
    param (
    
        [Parameter(Mandatory=$true)]
        [string]$streamAnalyticsJobName,
        
        [Parameter(Mandatory=$true)]
        [string]$resourceGroup
    )
    
    # Stop Job
    Write-Host "Stop Stream Analytics Job"
    Write-Host "- streamAnalyticsJobName: $streamAnalyticsJobName"
    Write-Host "- resourceGroup         : $resourceGroup"
    Write-Host "- We wait max 5 minutes for job to stop"
    
    $isStopping = $false
    $waitSeconds = 5
    $counter = 0
    
    # try for 5 minutes to start
    do {
      $counter++
      $seconds = $counter * $waitSeconds
      
      $result=az stream-analytics job list --resource-group $resourceGroup --query "[?contains(name, '$streamAnalyticsJobName')].name" --output table
      $count = ($result | Measure-Object).Count
      if ($count -eq 1) {
        # Job not found, it is new
        Write-Host "- Job not found in list. We will create new one."
        break
      }
    
      # Current Status
      $resultRaw = az stream-analytics job show --job-name $streamAnalyticsJobName --resource-group $resourceGroup
    
      if ($? -eq $false) {
        # Job not found, it is new
        Write-Host "- Job not found. We will create new one."
        break
      }
    
      $result = $resultRaw | ConvertFrom-Json
      if ($null -eq $result) {
        # Job not found, it is new
        Write-Host "- Job not found. We will create new one."
        break
      } 
    
      # Job already exists, get job state
    
      $jobstate = $result.Jobstate
      Write-Host "- Current Jobstate: $jobstate"
    
      if ($jobstate -eq 'Stopped' -or $jobstate -eq 'Created' -or $jobstate -eq 'Failed') {
        break
      }
    
      # Only send stop command once
      if ($isStopping -eq $true) {
        Write-Host "- Job is already stopping, waiting for it to stop"
      } else {
        $isStopping = $true
        Write-Host "- Job is not stopped, stopping"
        az stream-analytics job stop --job-name $streamAnalyticsJobName --resource-group $resourceGroup
      }
    
      Write-Host "- Still stopping ($seconds seconds passed)"
      Start-Sleep -Seconds $waitSeconds
    
    } while ($seconds -lt 300)
    
    if ($seconds -gt 290) {
      Write-Error "- Job did not stop after 5 minutes"
      return
    }

    This script attempts to halt the specified job and will wait for 300 seconds, equivalent to 5 minutes, for a response. If the process exceeds this time frame, it indicates that stopping the job has likely failed.

    [CmdletBinding()]
    param (
    [Parameter(Mandatory=$true)]
    [Alias('name')]
    [string]$streamAnalyticsJobName,
    
    [Parameter(Mandatory=$true)]
    [Alias('rg')] 
    [string]$resourceGroup    
    )
    
    Write-Host "Start Stream Analytics Job"
    Write-Verbose "- streamAnalyticsJobName: $streamAnalyticsJobName"
    Write-Verbose "- resourceGroup         : $resourceGroup"
    
    az stream-analytics job start --job-name $streamAnalyticsJobName --resource-group $resourceGroup --no-wait
    
    $counter = 0
    $maxRetries = 60 # 60*10 seconds = 6 minutes
    
    $waitTime = $maxRetries * 10
    Write-Host "- Job should start within 120 seconds, we try max $waitTime seconds"
    
    do {
    $counter++
    
    # Current Status
    $result = az stream-analytics job show --job-name $streamAnalyticsJobName --only-show-errors --resource-group $resourceGroup | ConvertFrom-Json
    
    if ($null -eq $result) {
        # Job not found, it is new
        Write-Error "- Job not found, we have a problem"
        break
    }
    
    # Job already exists
    $jobstate = $result.Jobstate
    $seconds = $counter * 10
    Write-Host "- Waiting - Current Jobstate: $jobstate ($seconds seconds passed)"
    
    if ($jobstate -eq 'Started') {
        Write-Host "- Job started successfully"
        break
    } 
    
    if ($jobstate -eq 'Running') {
        Write-Host "- Job is running and started successfully"
        break
    }
    
    if ($jobstate -eq 'Failed') {
        Write-Error "- Job failed to start"
        break
    }
    
    Start-Sleep -Seconds 10
    
    } while ($counter -lt $maxRetries) 
    
    if ($counter -eq $maxRetries || $counter -gt $maxRetries) {
    Write-Error "- Job did not start successfully after 5 minutes"
    return $false
    }
    
    return $true

    ## Stopping and Starging the Job in a Pipeline

    The update of the job is done during a Azure DevOps Pipeline:

    parameters:
      - name: deploymentName
        type: string
      
      # ...
    
    jobs:
    - deployment: ${{ parameters.deploymentName }}
      displayName: ${{ parameters.deploymentTitle }}
      environment: ${{ parameters.environmentName }}
      workspace:
        clean: all
      strategy: 
        runOnce:
          deploy:
            steps:
            - download: current
              displayName: Download Artifacts
    
            - task: AzureCLI@2
              displayName: Stop ASA Job
              inputs:
                azureSubscription: ${{ parameters.azConnectionName }}
                scriptType: pscore
                scriptPath: $(Pipeline.Workspace)/Stop-StreamAnalyticsJob.ps1
                scriptArguments: >
                  -streamAnalyticsJobName ${{ parameters.streamAnalyticsJobName }}
                  -resourceGroup ${{ parameters.resourceGroup}}
    
            # ... update 
            
            - task: AzureCLI@2
              displayName: Restart ASA Job
              inputs:
                azureSubscription: ${{ parameters.azConnectionName }}
                scriptType: pscore
                scriptPath: $(Pipeline.Workspace)/Start-StreamAnalyticsJob.ps1
                scriptArguments: >
                  -streamAnalyticsJobName ${{ parameters.streamAnalyticsJobName }} 
                  -resourceGroup ${{ parameters.resourceGroup}}

    ## Conclusion

    With this approach, you are able to wait automatically in a pipeline for Azure Stream Analytics Job to stop and start again, to update the service.

  • Export GitHub Pull Requests

    The Problem: Export Old Pull Requests from GitHub

    For various (perhaps less than rational) reasons, I find myself needing to document my past work using Pull Requests. Since this is more about quantity than quality, I sought to automate the task. To simplify the process, I crafted a concise bash script that achieves precisely that, generating Markdown files.

    The Code in Bash

    #!/bin/bash
    set -e
    
    # Max number of PRs
    LIMIT=500
    
    # Check Output Folder
    if [[ -z "${OUTPUT_FOLDER}" ]]; then
        # Set to default
        OUTPUT_FOLDER="ghexport"
    # else
        # Folder is set
    fi
    mkdir -p $OUTPUT_FOLDER
    
    PR_LIST_FILE="$OUTPUT_FOLDER/pr_list.txt"
    gh pr list --json number --state closed --jq '.[].number' -L $LIMIT > $PR_LIST_FILE
    
    lines=$(cat $PR_LIST_FILE)
    for PR_NUMBER in $lines
    do
        # Export PR into md file
        echo "Current PR: $PR_NUMBER "
        FILE_NAME="$OUTPUT_FOLDER/$PR_NUMBER.md"
    
        echo "Filename: $FILE_NAME"
    
        gh pr view $PR_NUMBER --json number,title,body,reviews,assignees,author,commits \
            --template   '{{printf "# %v" .number}} {{.title}}
    
    Author: {{.author.name}} - {{.author.login}}
    
    {{.body}}
    
    ## Commits
    {{range .commits}}
    - {{ .messageHeadline }} [ {{range .authors}}{{ .name }}{{end}} ]{{end}}
    
    ## Reviews
    
    {{range .reviews}}{{ .body }}{{end}}
    
    
    ' > $FILE_NAME
    
    done
    
    # ## Assignees
    # {{range .assignees}}{{.login .name}}{{end}}

    The code can be accessed on GitHub: oliverscheer/github-export: Export Pull Requests and contributor information from GitHub projects.

    To be unequivocal, mandating developers to document their work through a set number of Pull Requests is among the least productive tasks managers can impose on their teams.